
32 Luxury Home Decor Ideas To Copy In 2026
Make a home feel expensive with simple updates that change the whole mood of a room. A plain space can still look polished, warm, and high-end when you choose the right textures, colors, and details. In my experience, the small choices often make the biggest difference. A better lamp, a fuller curtain panel, or a cleaner shelf edit can shift a room fast. This guide shares 33 stylish ideas that help you create a richer look without a major renovation. You will see how to add depth, balance, and a more elevated feel to everyday spaces.
Crown Molding Illusion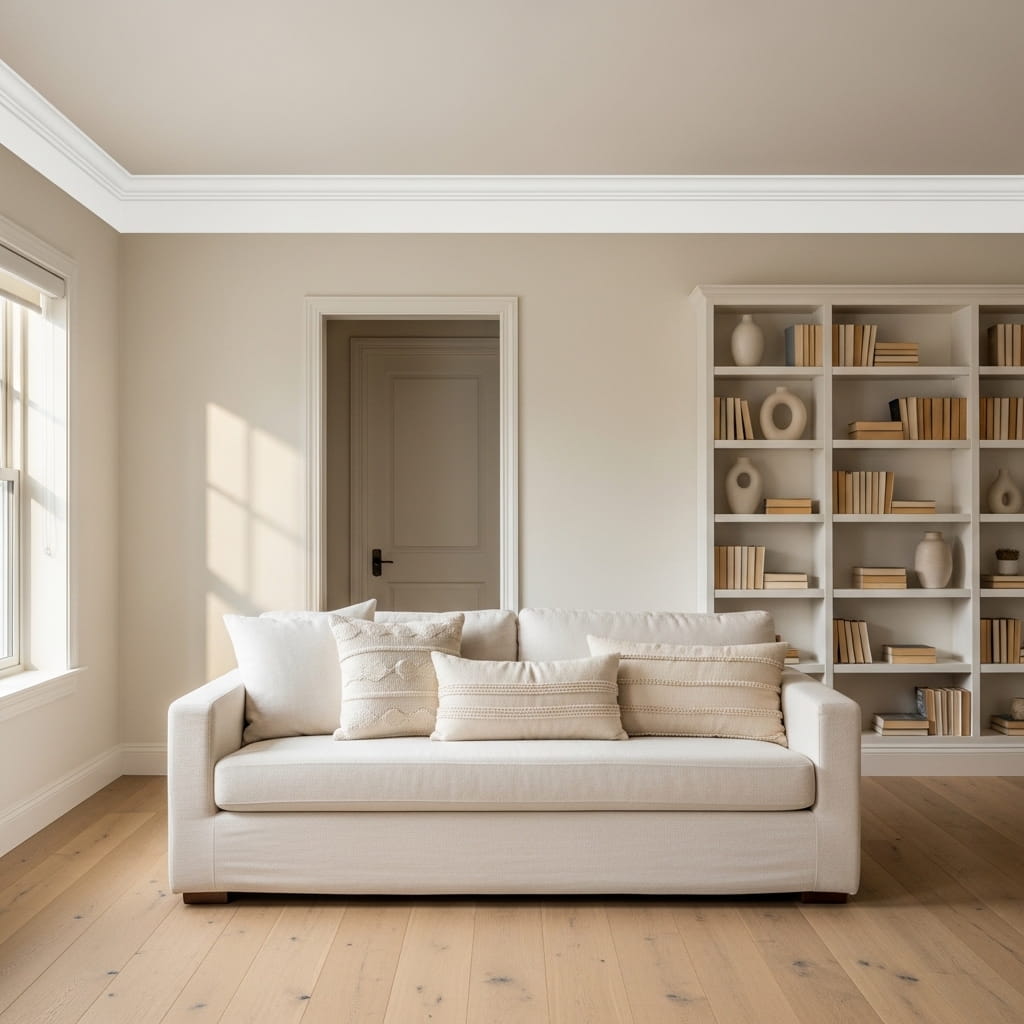
A single afternoon of applying peel-and-stick crown molding strips along your ceiling perimeter delivers one of the most dramatically luxurious architectural upgrades achievable in any room without hiring a single contractor. Crown molding creates the visual impression of higher ceilings, more refined wall architecture, and significantly more expensive construction quality — transforming a plain rental apartment living room into a space that feels genuinely custom-built. Furthermore, modern peel-and-stick molding strips cost between $25 and $60 per room and require zero carpentry skills to install cleanly. Additionally, painting the molding the same crisp white as your ceiling creates a seamless architectural detail that reads as genuinely built-in rather than decoratively added.
- Crown molding adds instant architectural luxury
- Peel-and-stick strips suit rental-friendly upgrades
- White molding visually raises ceiling height
- Entire room upgrade costs under $60
- Zero carpentry skills required for installation
Choosing the right crown molding profile width for your specific room height determines whether the molding looks elegantly proportioned or visually overwhelming against your walls and ceiling. Rooms with standard 8-foot ceilings suit molding profiles between 3 and 4 inches wide — wider profiles on low ceilings create a heavy, oppressive border that makes the ceiling feel lower rather than higher. Moreover, rooms with 9 or 10-foot ceilings accommodate 5 to 6-inch profiles beautifully — the wider molding fills the generous ceiling-to-wall transition proportionally. Additionally, installing a second, thinner molding strip 4 inches below the first creates a double-layer architectural detail that elevates the entire room from simply finished to genuinely grand without significant additional cost.
Linen Curtain Upgrade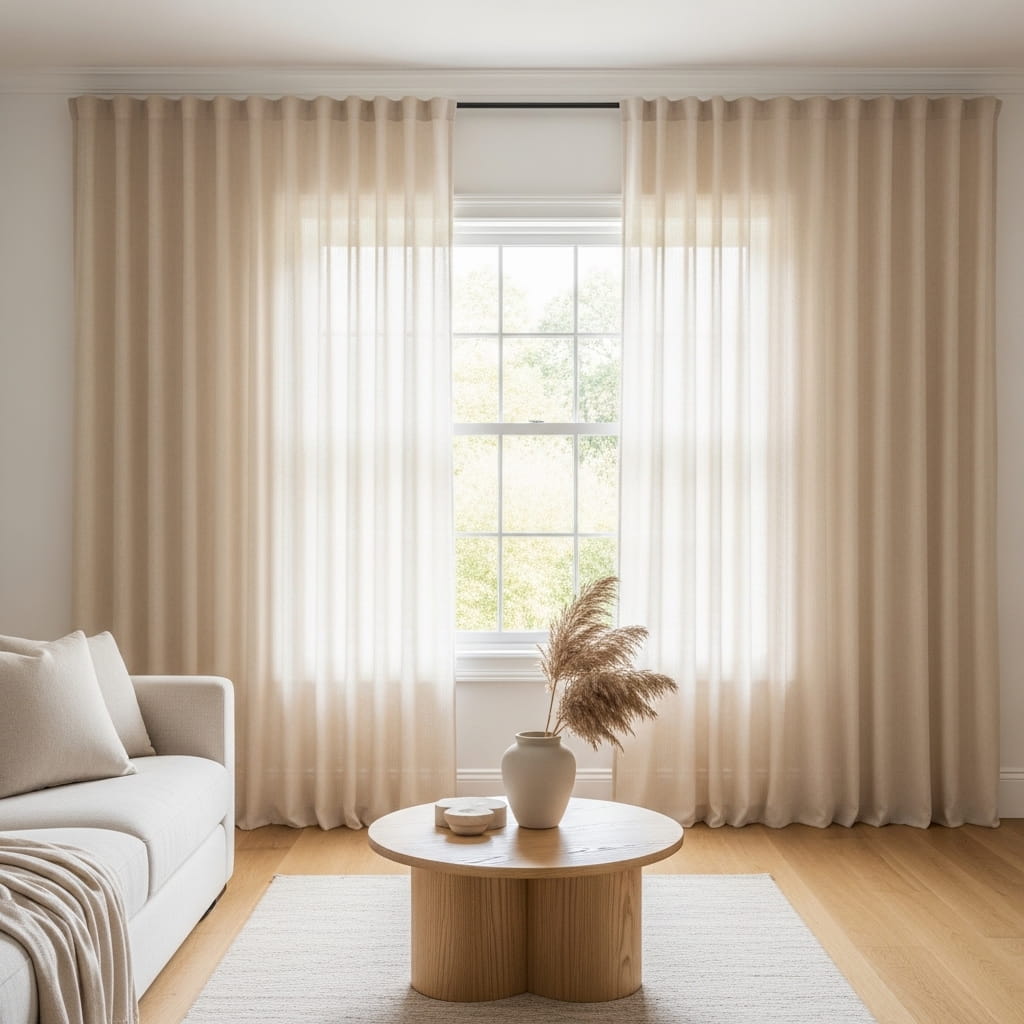
Hanging floor-to-ceiling linen curtain panels mounted 4 inches below the ceiling — rather than directly above the window frame — creates one of the single most impactful and budget-friendly luxury home upgrades available to any homeowner or renter. This curtain mounting technique visually elongates every wall in the room by drawing the eye upward from the floor to the ceiling in one uninterrupted vertical sweep — creating the impression of dramatically taller, more architecturally significant windows than the actual window size delivers. Furthermore, natural linen curtains in cream or warm white filter afternoon light with a soft, diffused warmth that synthetic polyester curtains never replicate. Moreover, allowing the curtain hem to pool 1 to 2 inches on the floor adds effortless, relaxed luxury.
- Floor-to-ceiling panels visually raise room height
- Natural linen filters light with warm softness
- Ceiling-mounted rods elongate every wall dramatically
- Pooled hem adds effortless casual luxury
- Linen panels suit every home decor style
Selecting the correct curtain panel width for a floor-to-ceiling linen installation requires purchasing panels that measure 2.5 to 3 times the total window width — this generous fabric ratio creates the full, billowing curtain fullness that signals genuine luxury rather than the flat, skimpy appearance of under-purchased curtain panels. Furthermore, most homeowners make the critical mistake of buying 1 panel per window rather than 2 — a single panel drawn to one side looks sparse and unfinished, while 2 panels that frame the window symmetrically create the balanced, architectural curtain arrangement that genuinely elevates the entire room. Additionally, a simple tension rod positioned inside the window frame behind the linen panels adds a secondary sheer layer that provides daytime privacy without blocking natural light.
Arched Mirror Statement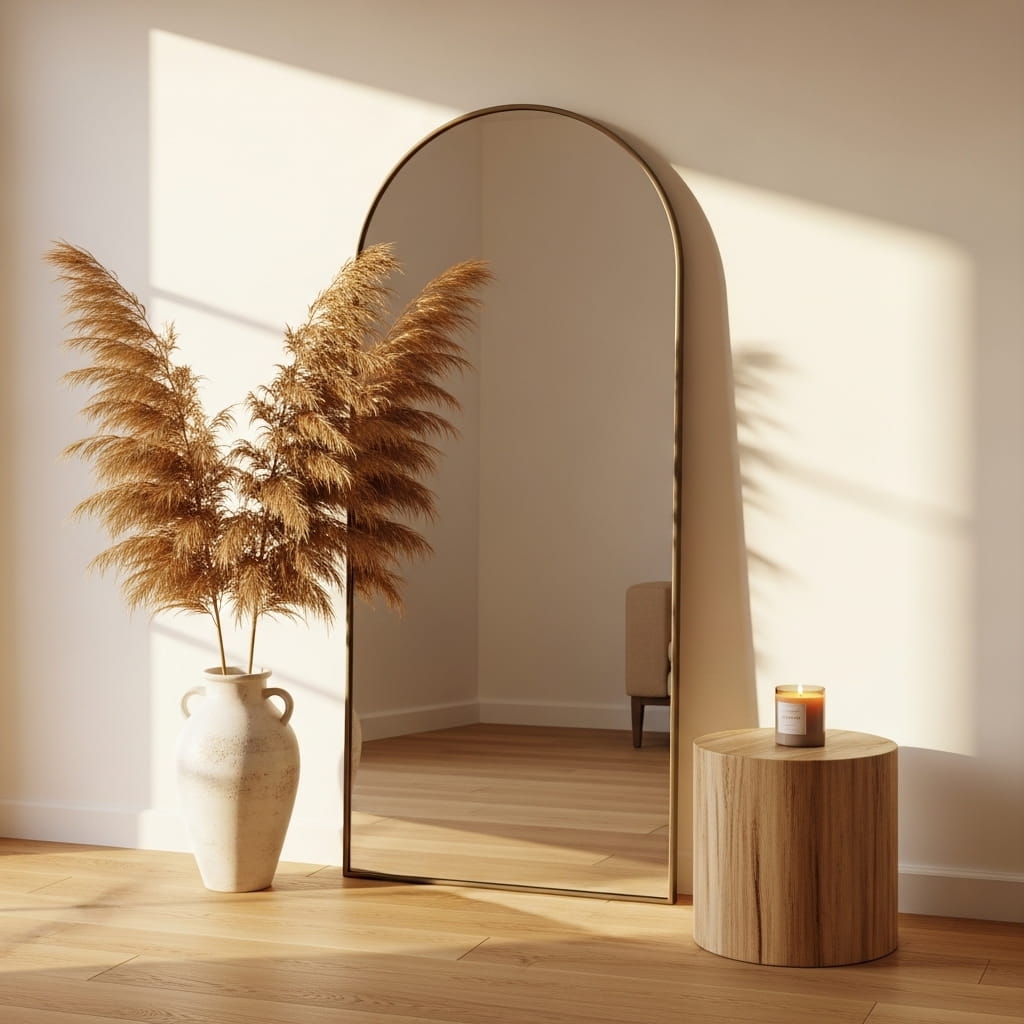
A large arched floor mirror leaning casually against a living room or entryway wall delivers 3 simultaneous luxury upgrades in a single furniture purchase — it reflects natural light to brighten the entire room, visually doubles the perceived square footage of any space, and introduces the elegant architectural arch silhouette that characterizes genuinely upscale interior design. The arched mirror format specifically communicates expensive taste because the curved top profile references classical architectural elements found in high-end hotels, designer showrooms, and luxury residential interiors. Furthermore, leaning the mirror rather than mounting it creates an intentionally relaxed, editorial styling approach that feels effortlessly sophisticated. Additionally, a thin aged brass frame adds warm metallic refinement without visual heaviness.
- Arched silhouette adds instant architectural elegance
- Mirror doubles perceived room square footage
- Reflected light brightens dark room corners
- Aged brass frame delivers warm metallic luxury
- Leaning placement creates editorial styled appearance
Positioning an arched floor mirror for maximum light-reflecting and space-expanding impact requires identifying the specific wall location and angle that captures the most beneficial light source in your room. Place the mirror on the wall directly perpendicular to your largest window — this perpendicular positioning captures incoming natural light and redirects it across the full width of the room rather than simply reflecting the opposite dark wall. Moreover, angling the mirror 3 to 5 degrees forward from perfectly vertical creates a flattering downward reflection that makes the floor space appear wider and deeper simultaneously. Additionally, styling a tall dried botanical floor vase beside the mirror base creates a composed, intentional vignette that prevents the mirror from looking like a standalone furniture piece waiting to be properly placed.
Layered Neutral Bedding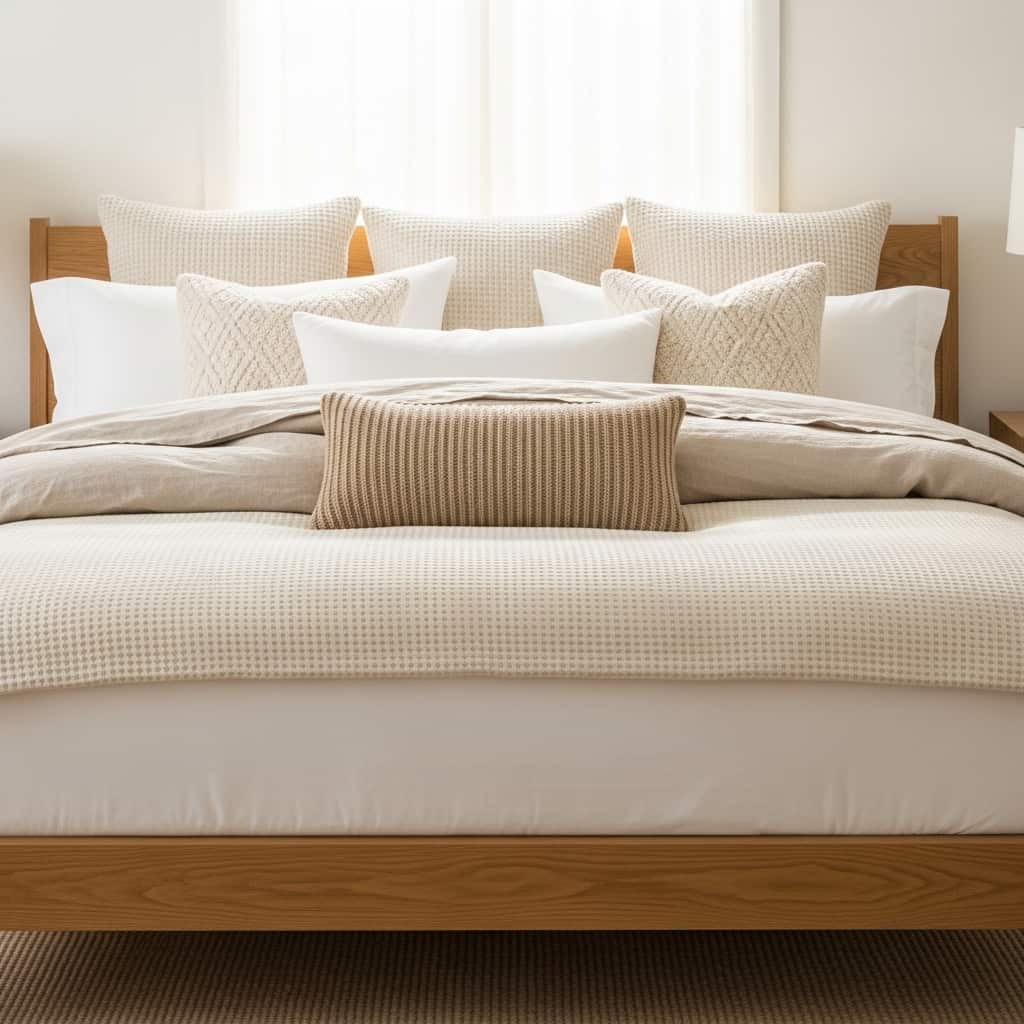
A properly layered neutral bedding arrangement — built from a white fitted sheet base through a cream waffle duvet to an oatmeal linen overlay folded back at the top third — creates the exact five-star hotel bedroom aesthetic that makes any master bedroom feel genuinely luxurious from the moment you walk through the door. The layered bedding technique works because it introduces 3 distinct textile textures — smooth cotton, waffle weave, and linen — within a single tonal cream and oatmeal palette, creating visual depth and tactile richness that a single flat duvet cover never achieves. Furthermore, the folded-back top layer reveals the contrasting texture beneath — communicating thoughtful, intentional styling. Moreover, this complete bedding transformation costs between $80 and $150.
- Layered textures create five-star hotel bedroom feel
- Waffle weave and linen deliver tactile luxury depth
- Folded-back duvet reveals contrasting texture beautifully
- Neutral palette suits every bedroom color scheme
- Complete layered bedding costs $80–$150 total
Building a hotel-quality layered bedding arrangement that maintains its beautiful, composed appearance through daily use requires understanding the specific pillow stacking sequence that professional hotel housekeeping teams use to create the full, architecturally structured headboard display. Position 2 large euro pillow shams flat against the headboard first — these form the back wall of the pillow arrangement. Moreover, place 2 standard sleeping pillows in matching linen cases directly in front of the euro shams, slightly overlapping the euro sham bottom edge. Additionally, centering a single ribbed knit lumbar pillow horizontally across the front of all 4 pillows completes the layered arrangement with a finishing accent that separates a casually made bed from a genuinely styled one.
Statement Entryway Console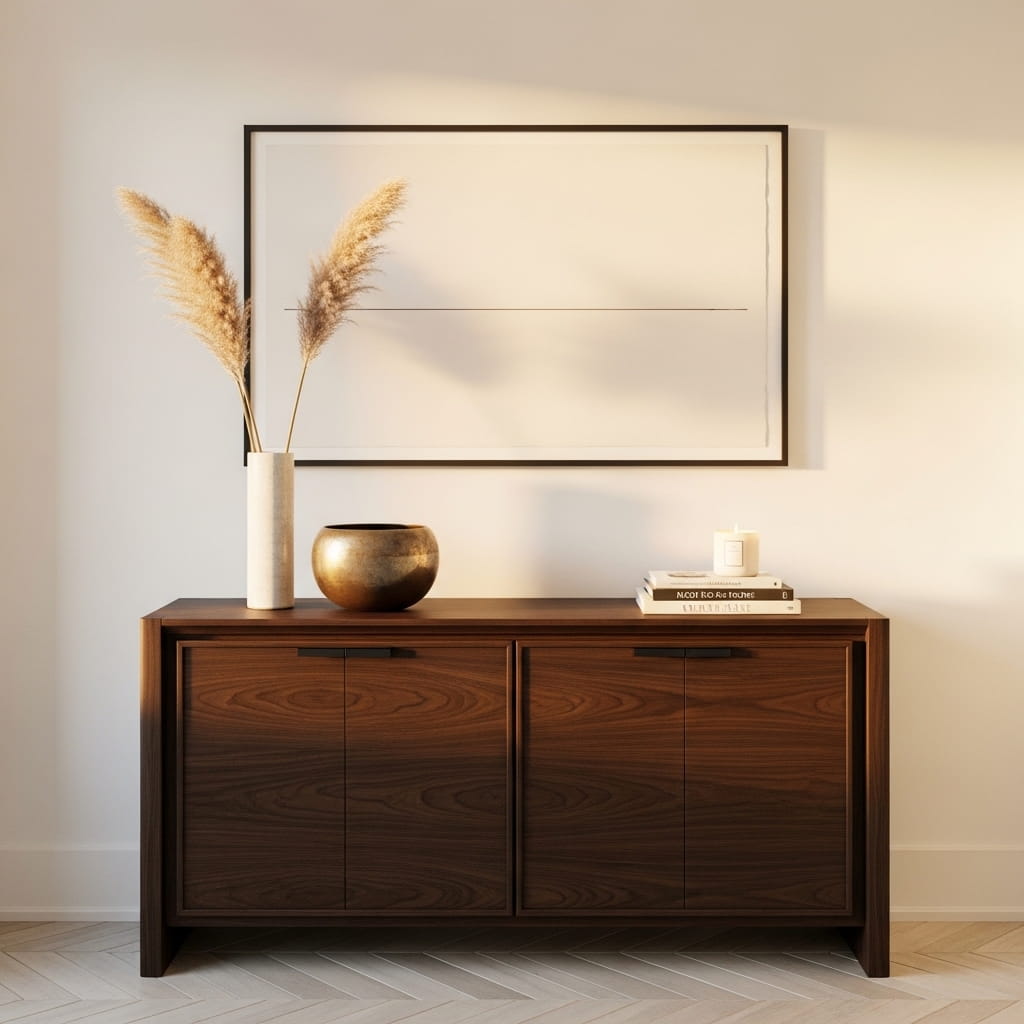
Your entryway console table creates the single most powerful first impression of your entire home — and a thoughtfully styled console vignette immediately signals the refined, curated aesthetic that makes a home feel genuinely expensive before guests see a single other room. The dark walnut console surface provides a rich, warm foundation for layering 4 to 5 carefully selected objects — tall dried botanicals, a decorative brass bowl, art books, and a candle — at varying heights that create dimensional visual interest. Furthermore, a large rectangular art print centered directly above the console extends the vignette vertically, transforming the console from a furniture piece into a complete architectural wall moment. Additionally, warm candlelight from the soy vessel candle elevates the entryway atmosphere immediately.
- Dark walnut console adds instant sophisticated warmth
- Layered vignette creates powerful first home impression
- Art print above console extends vertical visual story
- Dried botanicals add organic elegant entryway height
- Brass bowl introduces warm metallic luxury accent
Styling an entryway console vignette that looks professionally composed rather than randomly assembled requires applying the triangle composition rule that interior stylists use consistently across all console and shelf vignette work. Identify 3 anchor objects of significantly different heights — a tall vase at approximately 24 inches, a medium art book stack at approximately 8 inches, and a low candle vessel at approximately 4 inches. Moreover, arrange these 3 anchor objects in a triangular formation across the console surface — tall object to one side, medium object to the opposite side, and low object centered toward the front. Additionally, filling the negative space between the 3 anchor objects with 1 to 2 small decorative accessories — a brass bowl or a single sculptural object — completes the vignette without overcrowding the console surface.
Vintage Art Gallery Wall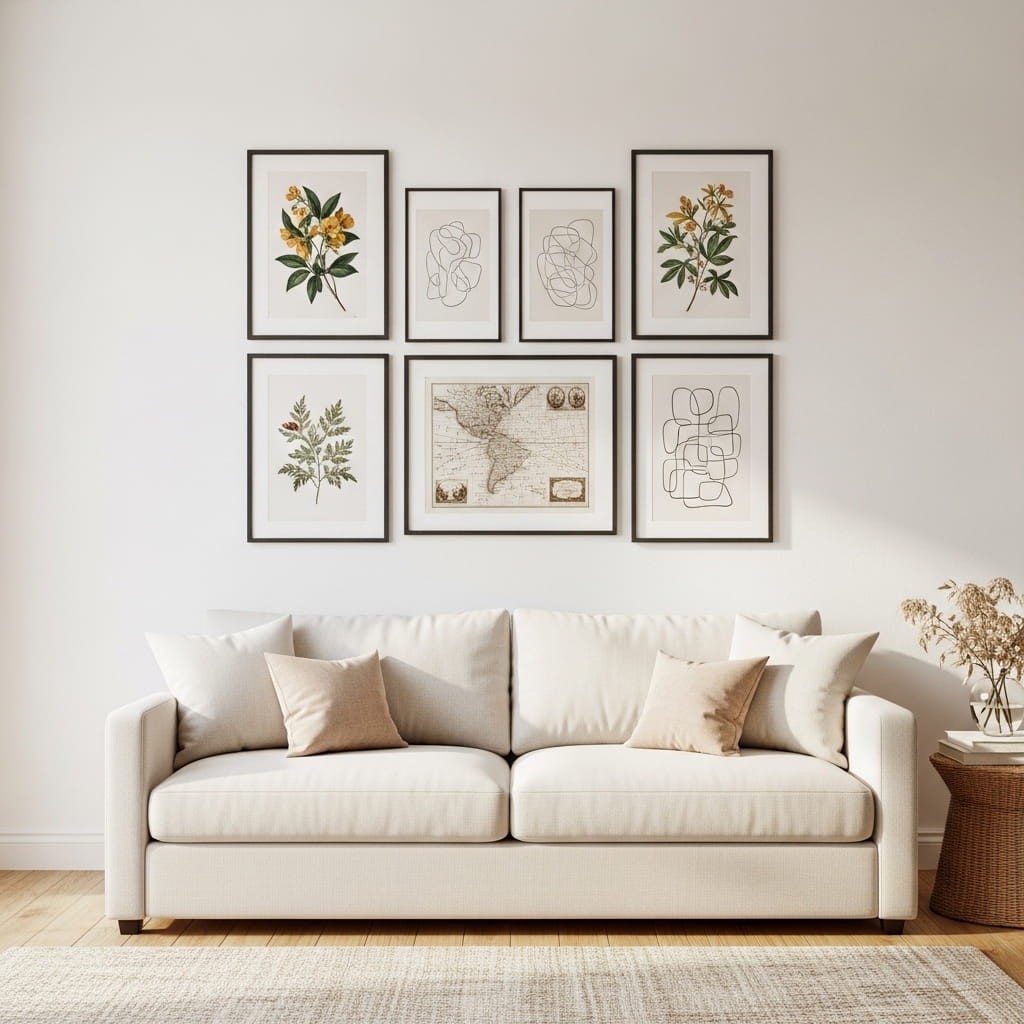
A carefully curated gallery wall of 7 matching thin-frame art prints creates the most visually commanding and intellectually sophisticated wall treatment achievable for any living room, bedroom, or home office — elevating a plain white wall into a fully designed architectural feature. The secret to a gallery wall that looks genuinely expensive rather than randomly assembled lies entirely in frame consistency — choosing identical thin black or aged brass frames for every print creates a unified, collected appearance that communicates intentional curation rather than casual accumulation. Furthermore, botanical illustrations, abstract line drawings, and vintage maps create a visually diverse but tonally cohesive print selection. Moreover, printing downloadable art files at home costs under $20 total for all 7 prints.
- Matching frames create unified expensive gallery appearance
- Botanical prints add organic intellectual wall character
- Symmetrical grid arrangement delivers clean visual order
- Downloadable art prints cost under $20 total
- Gallery wall suits living rooms and home offices
Hanging a 7-print gallery wall in a perfectly symmetrical grid requires measuring and marking the wall before driving a single nail — the measurement process takes 20 minutes but saves the wall damage and repeated repositioning that ruins most amateur gallery wall attempts. First, cut 7 paper templates the exact size of each framed print. Moreover, arrange the paper templates on the floor in your intended grid configuration and measure the exact spacing between each template — 2 inches of consistent gap between every frame creates the clean, intentional grid spacing that characterizes professionally hung gallery walls. Additionally, taping the paper templates directly onto the wall with painter’s tape before marking nail positions allows you to visualize the complete gallery arrangement and make repositioning adjustments without any wall damage.
Bouclé Accent Chair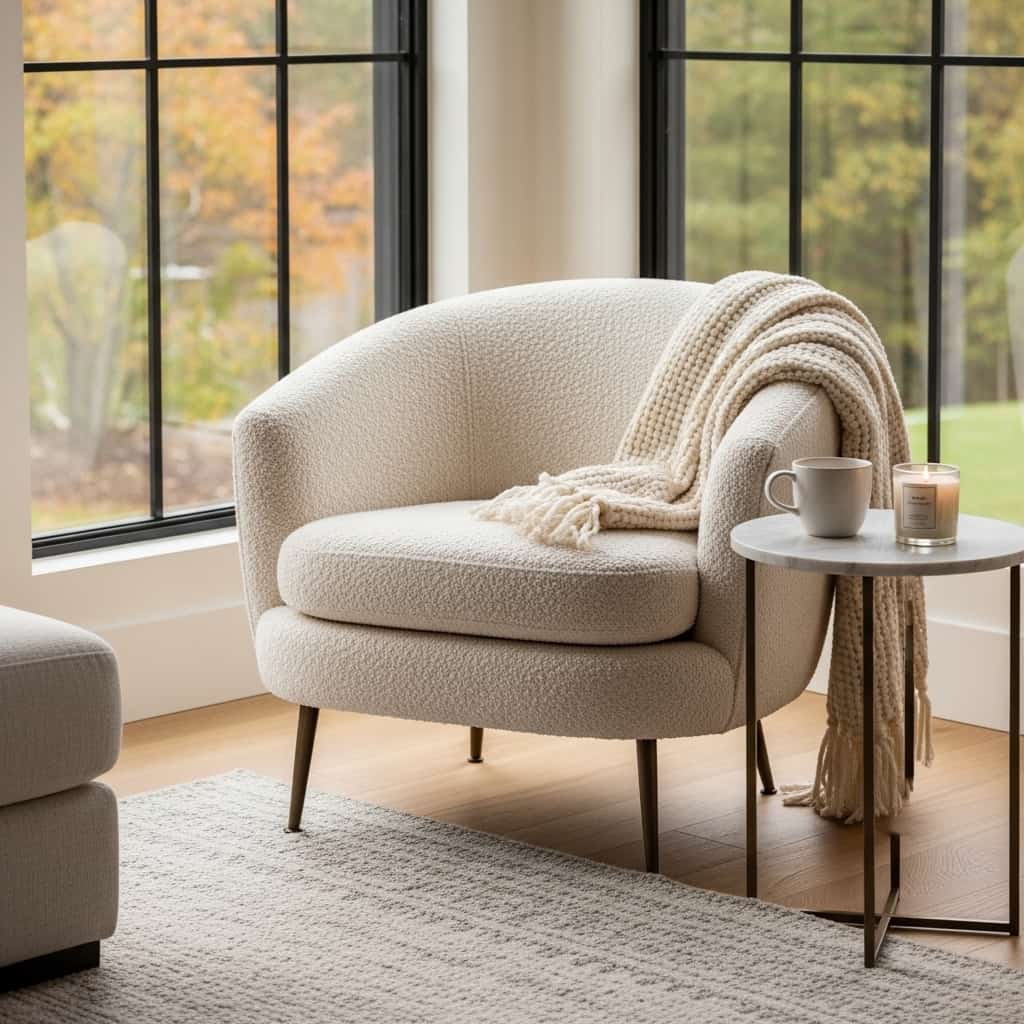
A single cream bouclé accent chair positioned in a living room corner delivers more visual luxury per square foot than almost any other furniture investment available — the sculptural rounded silhouette, cloud-soft texture, and warm cream tone communicate an expensive, designer-quality taste that immediately elevates the entire room’s perceived value. Bouclé fabric specifically signals luxury because its looped, textured weave surface appears in high-end interior design publications, luxury hotel lobbies, and designer showroom collections consistently — making it one of the most recognizable markers of sophisticated home styling. Furthermore, a slim aged brass leg base beneath the bouclé chair body introduces a warm metallic refinement that coordinates with gold, brass, and warm-toned accessories throughout the room. Moreover, a matching bouclé throw draped over one arm completes the look.
- Bouclé texture signals immediate designer luxury quality
- Sculptural rounded silhouette adds architectural room interest
- Aged brass legs deliver warm metallic elegance
- Corner placement creates intentional cozy reading nook
- Single chair transforms entire living room atmosphere
Choosing the right bouclé accent chair size for your specific living room layout requires evaluating 2 proportional measurements before purchasing — the chair’s overall diameter relative to the surrounding floor space, and the chair seat height relative to your existing sofa seat height. A bouclé accent chair in a living room with a standard sofa should measure between 28 and 32 inches in diameter — chairs narrower than 28 inches look visually insufficient beside a full-size sofa, while chairs wider than 32 inches consume excessive floor space in standard-size rooms. Moreover, matching the accent chair seat height within 2 inches of your sofa seat height creates a visually harmonious seating grouping where every seat feels intentionally coordinated rather than randomly collected from different furniture sources.
Marble Contact Paper Surfaces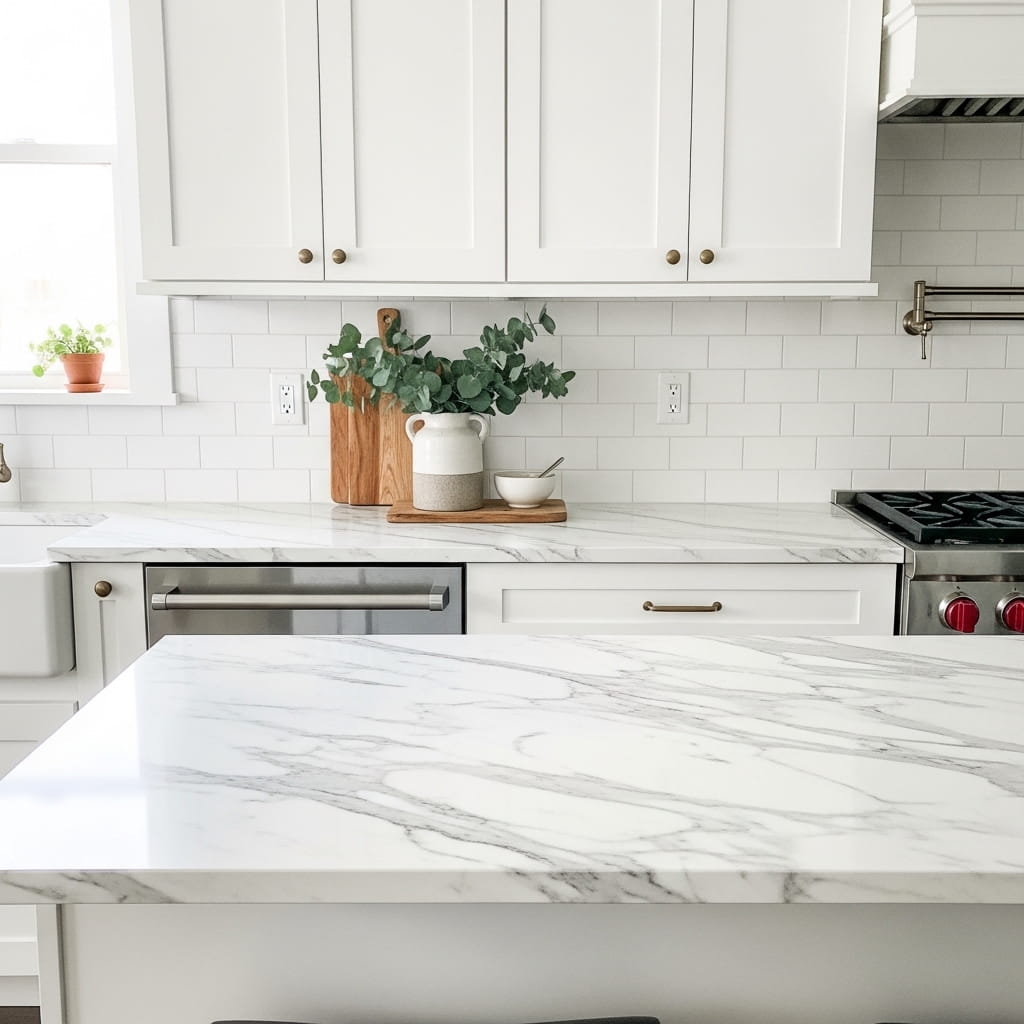
White marble contact paper applied to kitchen countertops, bathroom vanity surfaces, or a small coffee table top creates one of the most convincingly luxurious and dramatically transformative home upgrades achievable for under $30 — and the finished result photographs so beautifully that most viewers cannot distinguish it from genuine marble installation in digital images. Marble surfaces communicate wealth, refinement, and high-end design quality more powerfully than almost any other surface material in residential interiors — making marble-look contact paper one of the smartest budget investments for anyone wanting to make a home feel expensive without renovation costs. Furthermore, modern marble contact paper features realistic gray veining patterns and a smooth matte finish that genuinely mimics natural stone. Additionally, the application process takes under 2 hours per surface.
- Marble contact paper mimics genuine stone beautifully
- White marble surface signals instant luxury quality
- Under $30 total for complete counter transformation
- Removable application suits rental-friendly upgrades
- Marble look elevates kitchens and bathroom vanities
Applying marble contact paper to a kitchen countertop so it looks smooth, seamless, and genuinely professional requires following a specific installation sequence that eliminates the air bubbles, visible seams, and edge lifting that characterize amateur contact paper applications. First, clean the countertop surface with isopropyl alcohol and allow it to dry completely for 30 minutes — any moisture or grease beneath the contact paper causes immediate adhesion failure and visible bubbling. Moreover, use a credit card or squeegee to smooth the contact paper from the center outward in firm, overlapping strokes as you peel the backing — working from center to edges rather than from one end to the other prevents air from becoming trapped beneath the surface. Additionally, applying a thin bead of clear waterproof sealant along every cut edge prevents moisture from lifting the contact paper at vulnerable countertop perimeter points.
Layered Area Rug Trick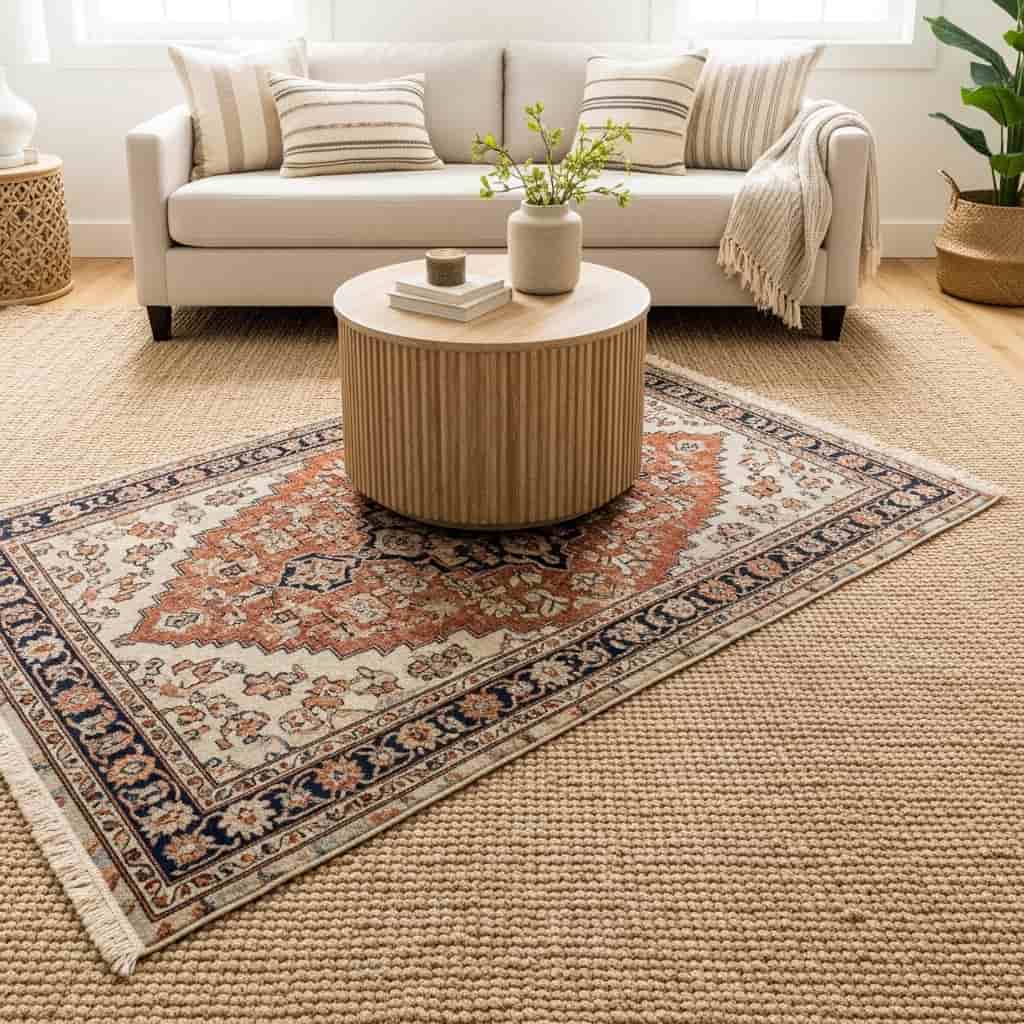
Layering a smaller vintage Persian rug on top of a large natural jute base rug creates one of the most visually rich and texturally sophisticated floor treatments achievable in any living room — and the layered rug technique genuinely mimics the curated, collected appearance of high-end interior design showrooms that charge thousands for similar floor styling effects. The large jute base rug anchors the entire seating arrangement while the smaller vintage rug positioned on top adds bold pattern, rich color, and a sense of layered depth that a single rug alone never creates. Furthermore, the slight angle of the top rug relative to the base rug introduces an intentionally relaxed, editorial quality. Moreover, this layered rug combination costs between $60 and $120 total using affordable sourced rugs.
- Layered rugs create designer showroom floor depth
- Jute base rug anchors entire seating arrangement
- Vintage Persian rug adds rich pattern and color
- Angled top rug creates intentional editorial styling
- Complete layered rug look costs $60–$120 total
Selecting the right size combination for a layered rug arrangement requires following the proportional sizing rule that interior stylists apply to ensure both rugs remain clearly visible and visually distinct after layering. The base jute rug should extend at least 18 inches beyond every edge of the top rug — this generous size differential ensures the jute border frames the top rug clearly rather than the 2 rugs blending together at the edges into a visually confusing surface. Moreover, the top vintage rug should cover between 40 and 60 percent of the base rug’s total surface area — top rugs smaller than 40 percent of the base look undersized and visually insignificant, while top rugs larger than 60 percent eliminate the framing effect that makes the layered rug technique work so powerfully.
Sculptural Table Lamp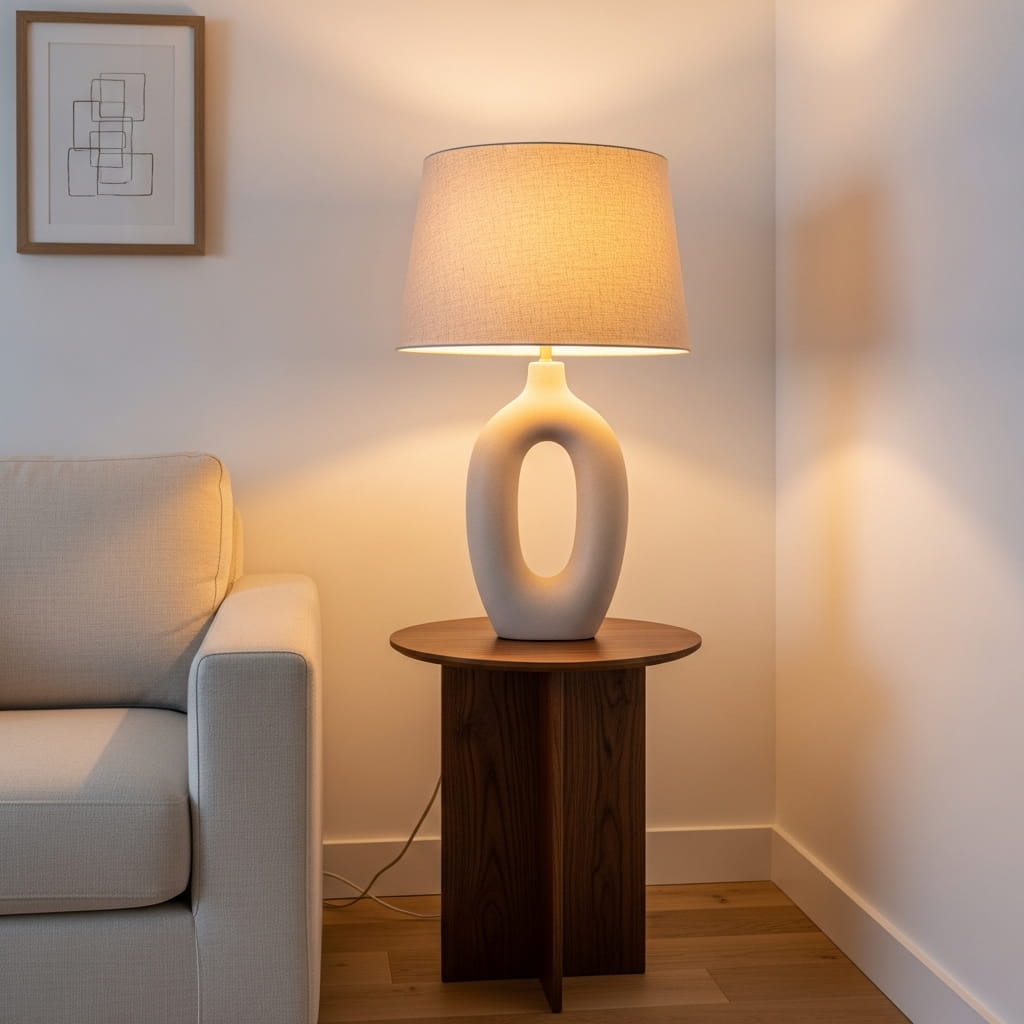
A single sculptural ceramic table lamp with an organic, hand-thrown base shape and a wide natural linen shade creates more immediate visual luxury in a living room corner than any wall paint color, throw pillow collection, or shelf arrangement achievable at a comparable price point. Lighting quality defines the perceived value of every room more powerfully than any other single decorating element — and a sculptural lamp with a warm amber glow transforms a plain living room corner into a warmly intimate, intentionally designed space within seconds of switching it on. Furthermore, cream ceramic lamp bases with irregular, organic shapes communicate artisan craftsmanship and designer quality. Moreover, a wide linen shade diffuses light with a warm, flattering softness that plastic shades never replicate.
- Sculptural ceramic base signals artisan luxury quality
- Wide linen shade diffuses warm flattering light
- Organic lamp shape adds designer room character
- Warm amber glow transforms living room atmosphere
- Single lamp elevates entire room corner instantly
Choosing a sculptural table lamp that genuinely elevates a room’s perceived luxury requires evaluating 3 specific design characteristics beyond simply selecting an aesthetically appealing base shape. First, the lamp base height should measure between 24 and 28 inches including the shade — lamps shorter than 24 inches disappear visually beside a standard sofa arm, while lamps taller than 28 inches overwhelm the side table surface and create an unbalanced top-heavy silhouette. Moreover, selecting a shade diameter that equals approximately two-thirds of the lamp base height creates the most visually proportioned lamp silhouette — a base measuring 18 inches tall suits a shade diameter between 12 and 14 inches. Additionally, always choose a lamp shade lined with a warm white or cream interior lining rather than a white exterior with a silver lining — silver-lined shades produce a cool, bluish light that undermines the warm, luxurious atmosphere a sculptural lamp exists specifically to create.
Brass Hardware Swap
Swapping every cabinet knob and drawer pull in your kitchen or bathroom for brushed aged brass hardware delivers one of the highest visual return-on-investment upgrades available in any home — transforming standard builder-grade cabinetry into custom, designer-quality furniture for under $80 total in most kitchens. Aged brass hardware communicates warmth, sophistication, and deliberate design intention in a way that chrome, nickel, and basic brushed steel hardware simply cannot — the warm golden tone elevates white, cream, navy, and forest green cabinetry equally effectively across every kitchen and bathroom color palette. Furthermore, replacing cabinet hardware requires only a screwdriver and takes under 90 minutes for an average kitchen. Moreover, this single upgrade photographs beautifully and consistently generates high engagement on home decor platforms.
- Aged brass hardware transforms builder-grade cabinets instantly
- Warm golden tone suits every cabinet color
- Complete kitchen hardware swap costs under $80
- Screwdriver installation takes under 90 minutes
- Brass pulls photograph beautifully for home content
Selecting the correct brass hardware size for your specific cabinet doors and drawer fronts requires measuring 2 dimensions that determine whether the hardware looks elegantly proportioned or visually undersized against the cabinet surface. For drawer pulls, measure the full drawer front width and select a pull whose center-to-center measurement equals between one-third and one-half of the total drawer width — a 12-inch wide drawer suits a pull with a 3 to 4-inch center-to-center measurement. Moreover, for cabinet door knobs, position each knob 2.5 to 3 inches from the nearest door corner — knobs placed too close to the corner look cramped, while knobs centered on the door look visually lost on larger cabinet door surfaces. Additionally, mixing bar pulls on drawers with round knobs on cabinet doors creates a refined, layered hardware arrangement that professional kitchen designers use consistently.
Oversized Wall Art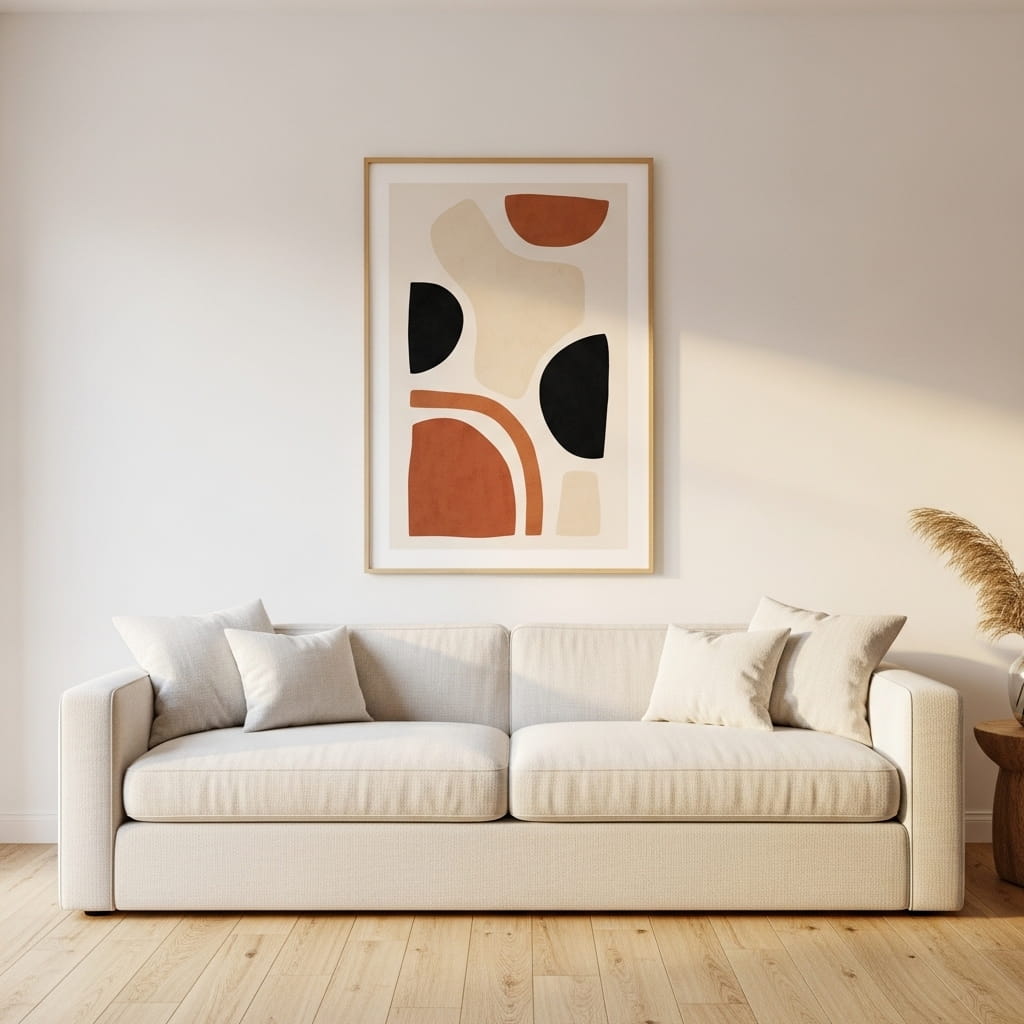
A single oversized art print — measuring 36 by 48 inches or larger — hung centered above a sofa creates a dramatically more luxurious and visually commanding living room focal point than any gallery wall of smaller prints achieves at the same wall location. Large-format art communicates confident, decisive decorating taste — the bold commitment to a single oversized piece signals design sophistication that collections of small, mismatched frames rarely convey. Furthermore, abstract art prints in warm cream, terracotta, and black tones suit virtually every living room color palette without requiring precise color matching. Moreover, printing a large-format digital art file at a local print shop costs between $15 and $35 — making this one of the most impactful and affordable luxury home upgrades available.
- Oversized art creates bold confident decorating statement
- Single large print outperforms multiple small frames
- Abstract warm tones suit every living room palette
- Large-format printing costs between $15 and $35
- Centered placement above sofa anchors entire room
Hanging an oversized art print so it appears perfectly centered and correctly proportioned above a sofa requires following the specific height measurement rule that professional art installers use on every residential and commercial installation. The bottom edge of the frame should sit between 6 and 8 inches above the sofa back — closer than 6 inches makes the art feel cramped against the furniture, while higher than 8 inches creates a disconnected gap that visually separates the art from the sofa beneath it. Moreover, the art print width should measure between two-thirds and three-quarters of the sofa’s total length — art narrower than two-thirds of the sofa width looks undersized and visually insufficient, while art wider than the sofa extends beyond the furniture’s visual boundary and creates an unbalanced wall composition.
Velvet Throw Pillow Mix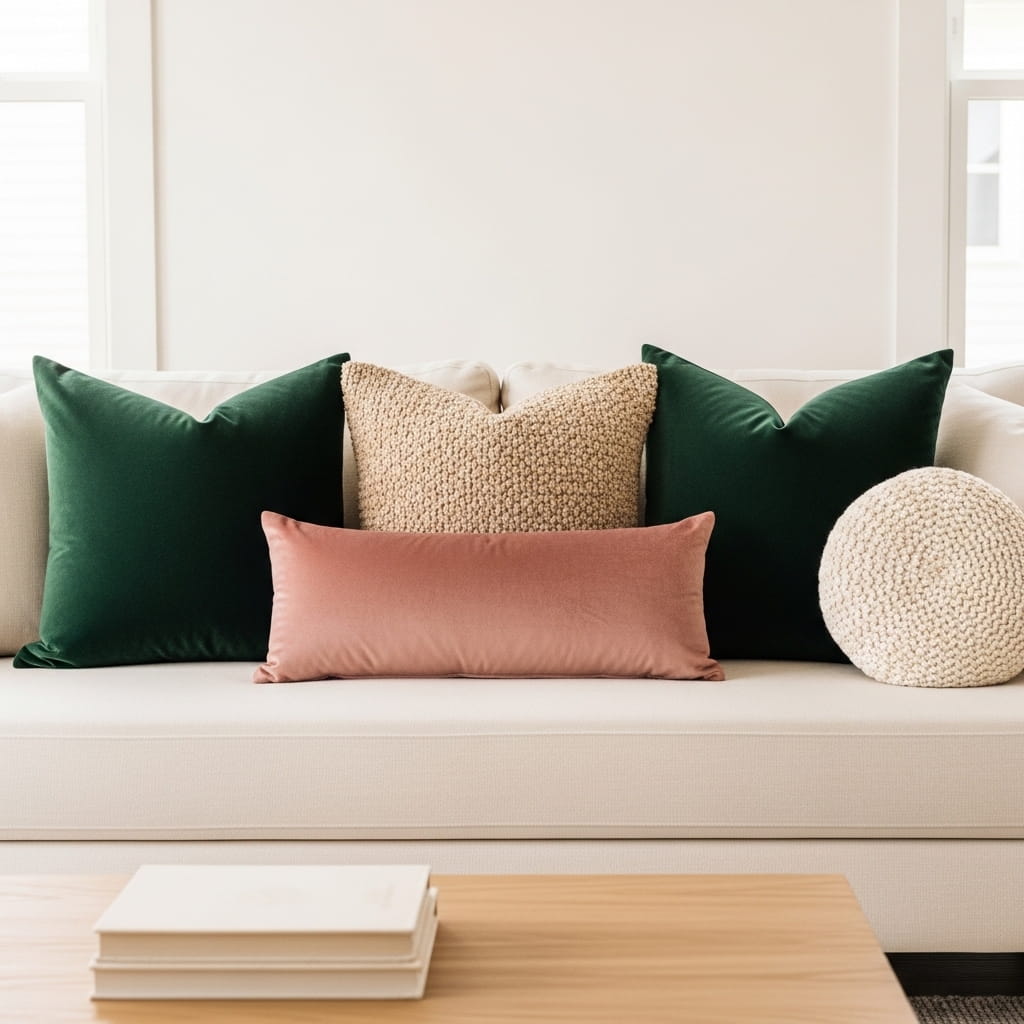
Five strategically layered throw pillows — combining deep forest green velvet squares, an oatmeal bouclé pillow, a dusty rose velvet lumbar, and a cream knit round — transform a plain cream linen sofa into a richly textured, luxuriously styled seating centerpiece that anchors the entire living room aesthetic. Velvet throw pillows specifically elevate sofa styling because the fabric’s light-reflective surface creates depth and richness that cotton and linen pillow covers cannot — velvet shifts from deep, saturated color in shadow to lighter, luminous tone in direct light, creating constant visual movement across the sofa surface. Furthermore, combining 3 different pillow sizes — large square, standard lumbar, and small round — creates the layered depth that characterizes professional interior styling. Moreover, the jewel-toned green and dusty rose combination creates a sophisticated, grown-up color pairing.
- Velvet fabric creates rich light-reflective sofa depth
- Jewel tones deliver sophisticated grown-up color palette
- Mixed pillow sizes create professional layered styling
- Bouclé pillow adds contrasting tactile texture variety
- 5-pillow arrangement transforms any plain sofa instantly
Arranging 5 throw pillows on a sofa so the grouping looks intentionally styled rather than randomly piled requires following the back-to-front layering sequence that interior stylists use to create the full, architecturally composed pillow arrangements seen in high-end interior photography. Place the 2 large square velvet pillows flat against the sofa back cushions first — these form the arrangement’s visual foundation. Moreover, position the medium bouclé square pillow slightly in front of and between the 2 large velvet squares — slightly overlapping the inner edges of both large pillows creates depth and visual connection between the layers. Additionally, leaning the lumbar pillow horizontally across the front of all 3 back pillows and placing the small round knit pillow at one end of the lumbar completes the arrangement with a casual, finished quality that elevates the entire sofa composition.
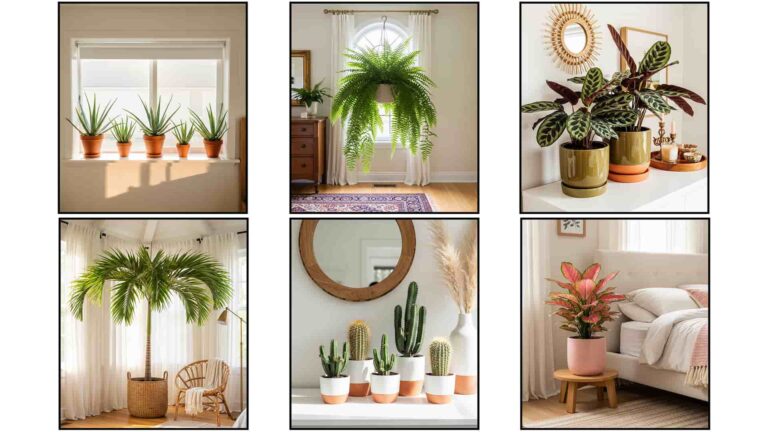
Indoor Potted Tree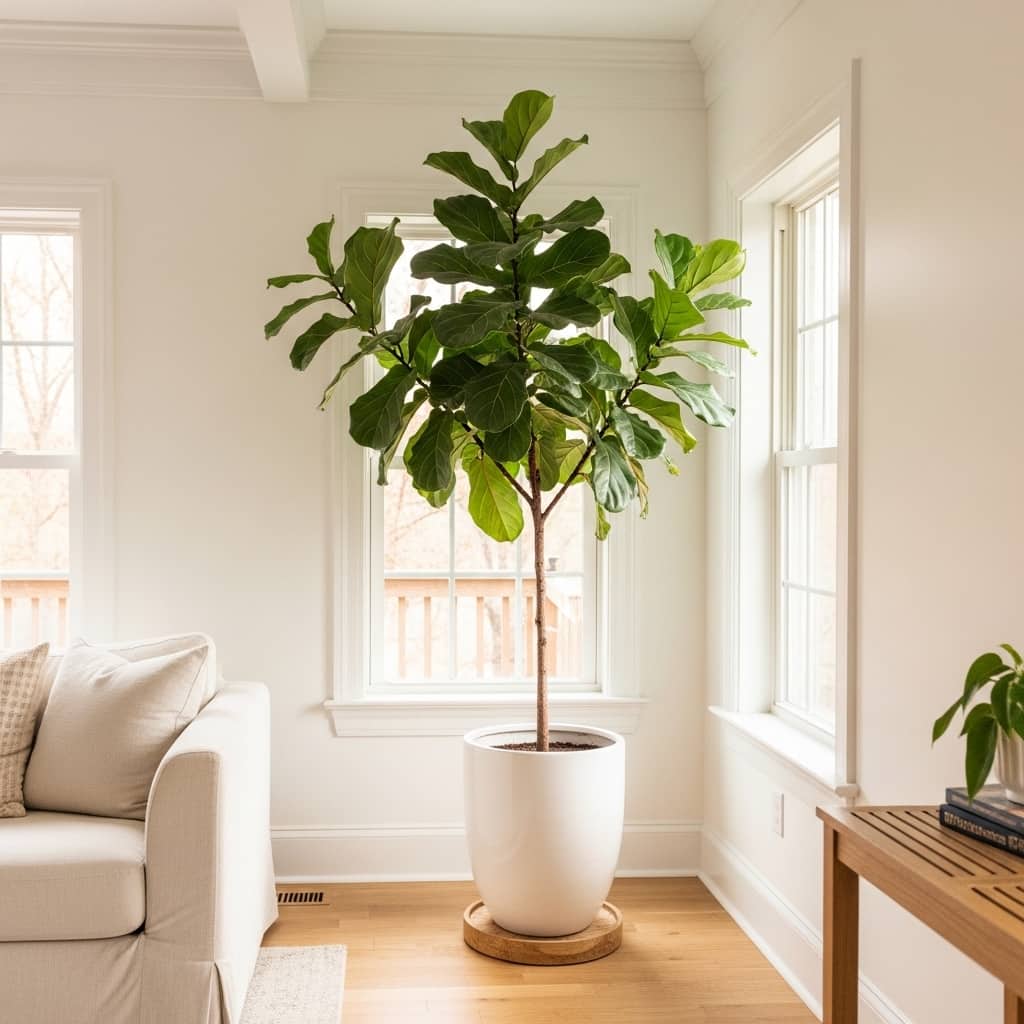
A single large indoor fiddle leaf fig tree — reaching 5 to 6 feet tall in a tall white ceramic pot on a natural wood plant stand — delivers the most dramatically alive, visually lush, and genuinely designer-quality room transformation achievable from a single plant purchase. Large indoor trees communicate that a home owner prioritizes living beauty, natural texture, and long-term space investment — all qualities that characterize genuinely expensive, thoughtfully curated home interiors. Furthermore, the fiddle leaf fig’s large, architectural dark green leaves create a bold tropical silhouette that reads as dramatically sculptural against white walls and light oak floors. Moreover, positioning the tree in a bright corner beside a large window creates a natural, sun-bathed living room moment that no artificial plant replicates convincingly.
- Large indoor tree creates instant designer room presence
- Fiddle leaf fig delivers bold architectural leaf silhouette
- White ceramic pot adds clean modern botanical base
- Wood plant stand elevates pot with natural warmth
- Living tree communicates genuine home investment value
Keeping a fiddle leaf fig tree healthy and visually lush in a living room corner requires understanding 3 specific care requirements that determine whether the tree thrives as a long-term design investment or declines within weeks of purchase. First, position the fiddle leaf fig within 3 to 5 feet of a bright window that receives indirect natural light for at least 6 hours daily — direct harsh sunlight scorches the large leaves, while insufficient light causes progressive leaf drop that strips the tree of its architectural fullness. Moreover, water the tree only when the top 2 inches of soil feel completely dry to the touch — overwatering causes root rot that kills fiddle leaf figs faster than any other single care mistake. Additionally, rotating the pot 90 degrees every 2 weeks ensures all sides of the tree receive equal light exposure, maintaining the full, even canopy silhouette that makes the tree most visually impressive.
Decorative Book Styling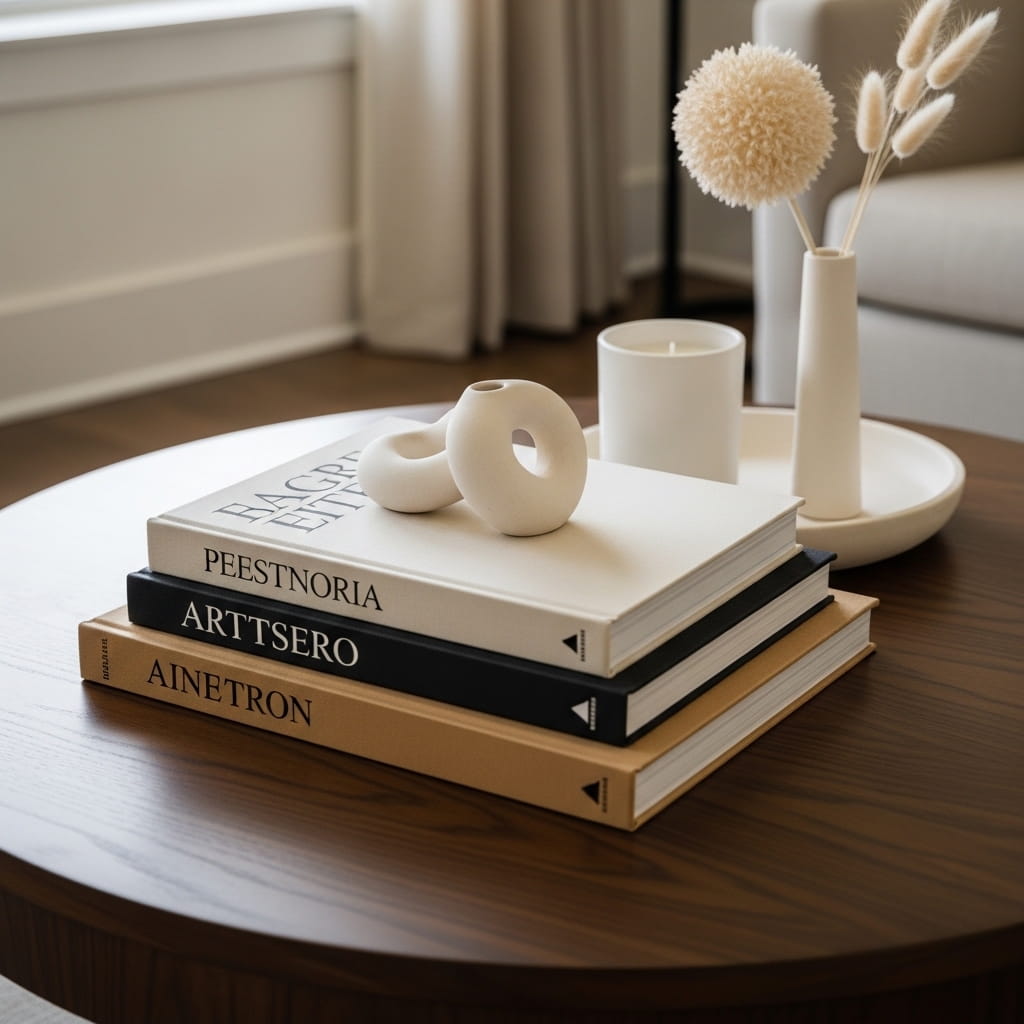
A carefully composed coffee table book stack — 3 large hardcover art and design books in coordinated cream, black, and tan covers topped with a small sculptural ceramic object — creates an immediate signal of cultured, sophisticated taste that elevates the entire living room’s perceived refinement and intellectual character. Coffee table books serve a dual decorating function that no other accessory replicates — they simultaneously act as visual art objects through their beautiful cover designs and as readable content that communicates the homeowner’s genuine aesthetic interests and intellectual curiosity to every visitor. Furthermore, stacking books in descending size order with the largest on the bottom creates a clean, architecturally stable tower that reads as intentionally composed. Moreover, topping the stack with a small sculptural object transforms the book tower into a complete vertical vignette.
- Art book covers add sophisticated visual room character
- Stacked books create clean architectural coffee table tower
- Sculptural topper transforms stack into complete vignette
- Book styling communicates cultured intellectual home taste
- Coordinated cover colors create cohesive table palette
Selecting coffee table books that look visually stunning and coordinate beautifully within your existing living room color palette requires evaluating book cover aesthetics — not just subject matter — as the primary selection criterion for decorative book styling purposes. Visit a bookstore or browse online specifically filtering for books with solid-color cloth or linen covers in cream, black, tan, forest green, or terracotta — these solid-color spines and covers photograph beautifully and coordinate with virtually every living room palette. Moreover, choosing books in 3 noticeably different sizes — large 12×15 inch, medium 10×12 inch, and small 8×10 inch — creates the graduated stack proportions that look most visually compelling on a coffee table surface. Additionally, removing paper dust jackets from hardcover books before stacking exposes the clean cloth cover beneath — delivering a far more sophisticated and cohesive visual result than busy printed dust jacket designs.
Framed Doorway Arch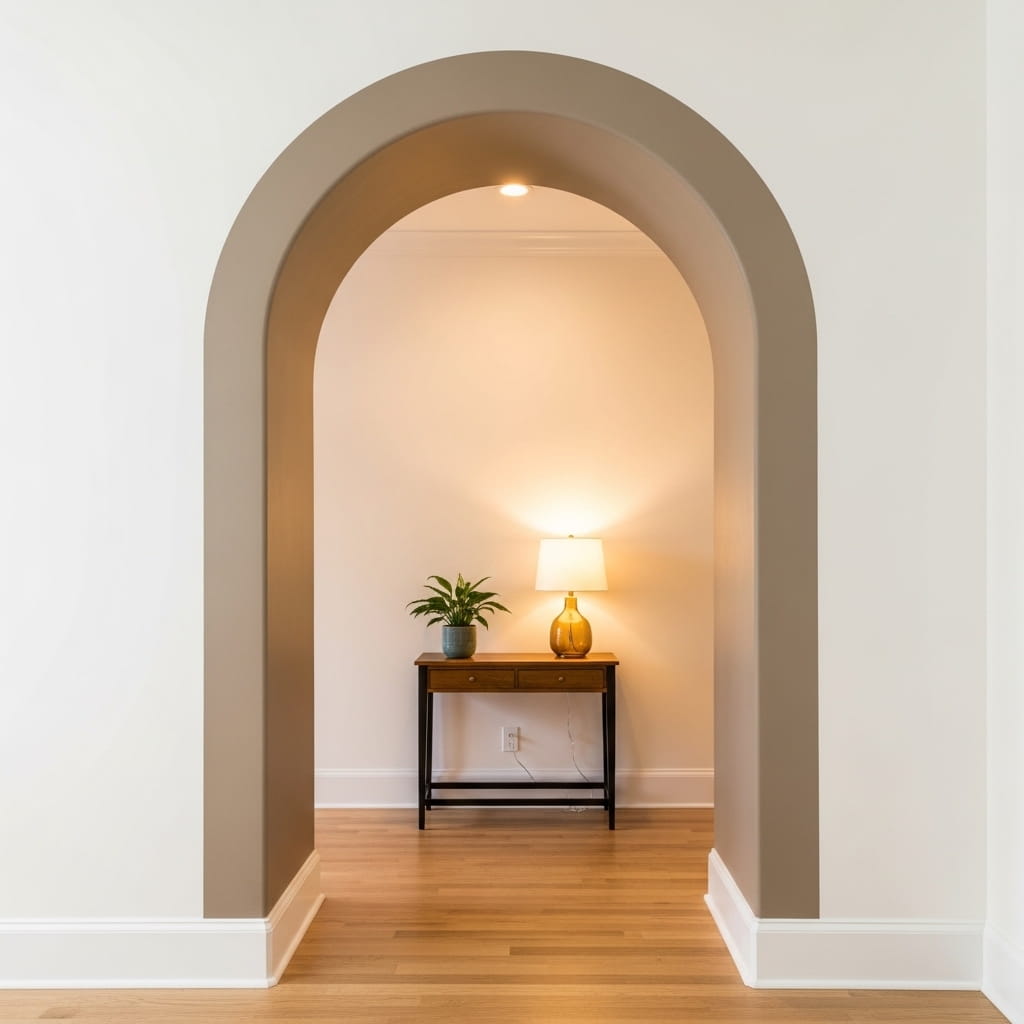
Painting a simple arch shape directly onto the wall surrounding an interior doorway — extending 12 inches beyond the frame on each side and 8 inches above the top — creates one of the most architecturally dramatic and visually surprising wall treatments achievable with nothing more than a can of paint, a pencil, and 2 hours of weekend time. Painted wall arches have dominated high-end interior design publications and luxury home renovation features for 3 consecutive years — communicating architectural intentionality and design confidence that instantly elevates the perceived quality of any home’s interior. Furthermore, painting the arch in a warm greige or deep terracotta color against white walls creates a bold, sophisticated architectural frame that transforms a plain doorway into a genuine design feature. Moreover, this entire upgrade costs under $15 in paint.
- Painted arch creates bold architectural doorway drama
- Warm greige tone suits every interior wall palette
- Arch painting costs under $15 in paint total
- Zero carpentry or contractor skills required
- Arch detail dominated luxury design publications 3 years
Creating a perfectly symmetrical painted wall arch around a doorway requires using a simple string compass method that ensures the curved arch top follows a mathematically precise arc rather than an irregular freehand curve. Tie a pencil to one end of a piece of string and hold the other end at the exact center point of the doorway top frame. Moreover, keeping the string taut, sweep the pencil in a smooth arc from one side of the arch starting point to the other — the consistent string length guarantees a perfectly even curve throughout the entire arch sweep. Additionally, marking the arch outline lightly in pencil first and filling it in with painter’s tape before applying the wall paint creates a perfectly clean, sharp arch edge that looks professionally executed rather than hand-painted.
Organic Stone Accessories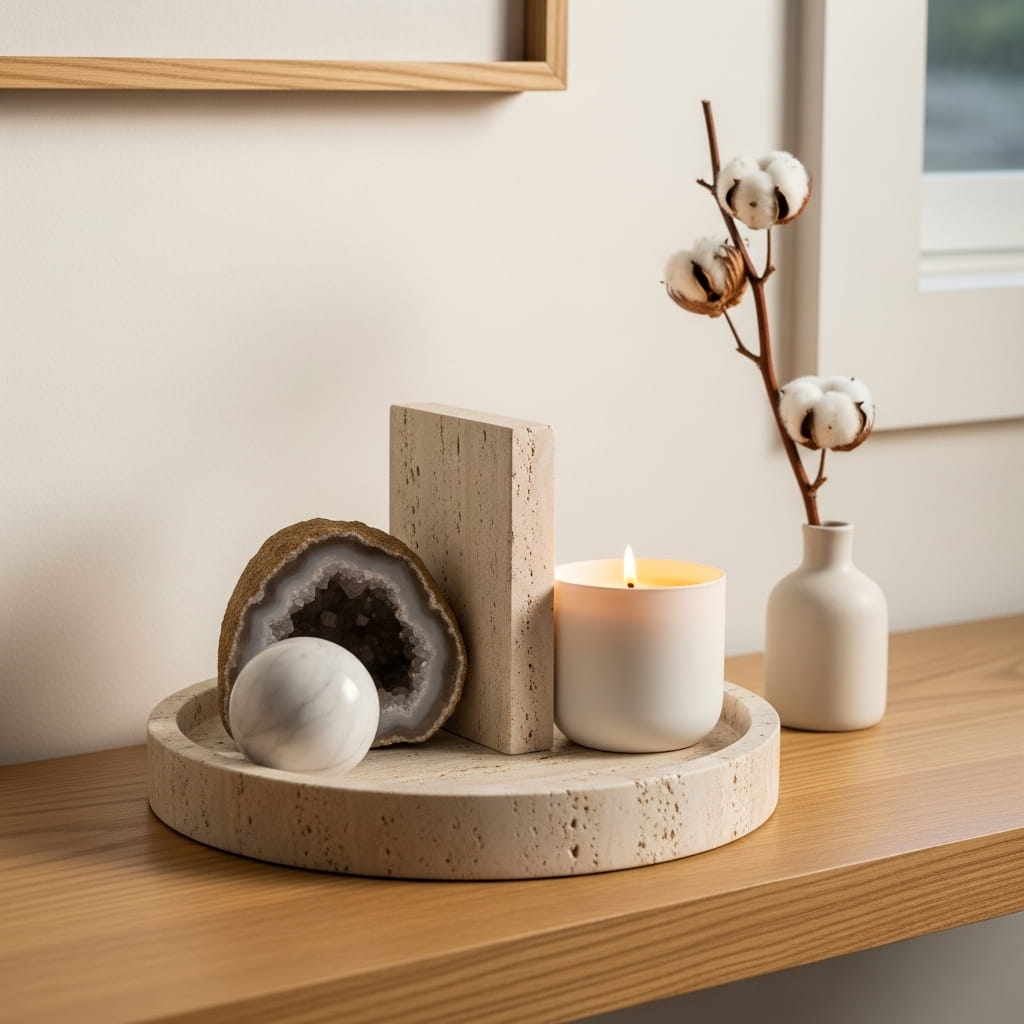
A small travertine stone tray holding a white marble sphere, a raw geode, and a lit soy candle creates a quietly powerful luxury accessory vignette that communicates expensive, naturally refined taste without requiring a single large furniture investment. Natural stone accessories — marble, travertine, and raw geode — carry an inherent material luxury that ceramic, plastic, and resin accessories cannot replicate because stone’s unique veining patterns, natural weight, and cool surface temperature communicate genuine geological rarity. Furthermore, grouping 3 to 4 stone accessories on a single tray creates a cohesive mineral collection that reads as deliberately curated rather than randomly placed. Moreover, the combination of polished marble, rough raw geode, and smooth travertine surfaces creates compelling tactile and visual contrast within a unified natural stone material family.
- Natural stone communicates genuine material luxury quality
- Travertine tray creates cohesive mineral collection display
- Marble sphere adds polished sculptural stone accent
- Raw geode introduces organic geological texture contrast
- Stone accessories photograph beautifully for home content
Sourcing natural stone accessories that look genuinely luxurious without a designer price tag requires knowing exactly which retail channels offer the most visually impressive stone objects at accessible price points. Raw geode bookends cost between $15 and $35 at crystal and mineral shops — the same objects retail for 3 to 5 times more at home decor boutiques with identical visual quality. Moreover, small white marble spheres cost between $8 and $20 at home goods stores and online marketplaces — choosing spheres with visible gray veining rather than pure white delivers more visual interest and looks more authentically luxurious than perfectly uniform white marble. Additionally, natural travertine stone trays cost between $20 and $45 and serve as the unifying base element that transforms 3 individual stone accessories into a cohesive, professionally composed luxury vignette.
Minimalist Shelf Styling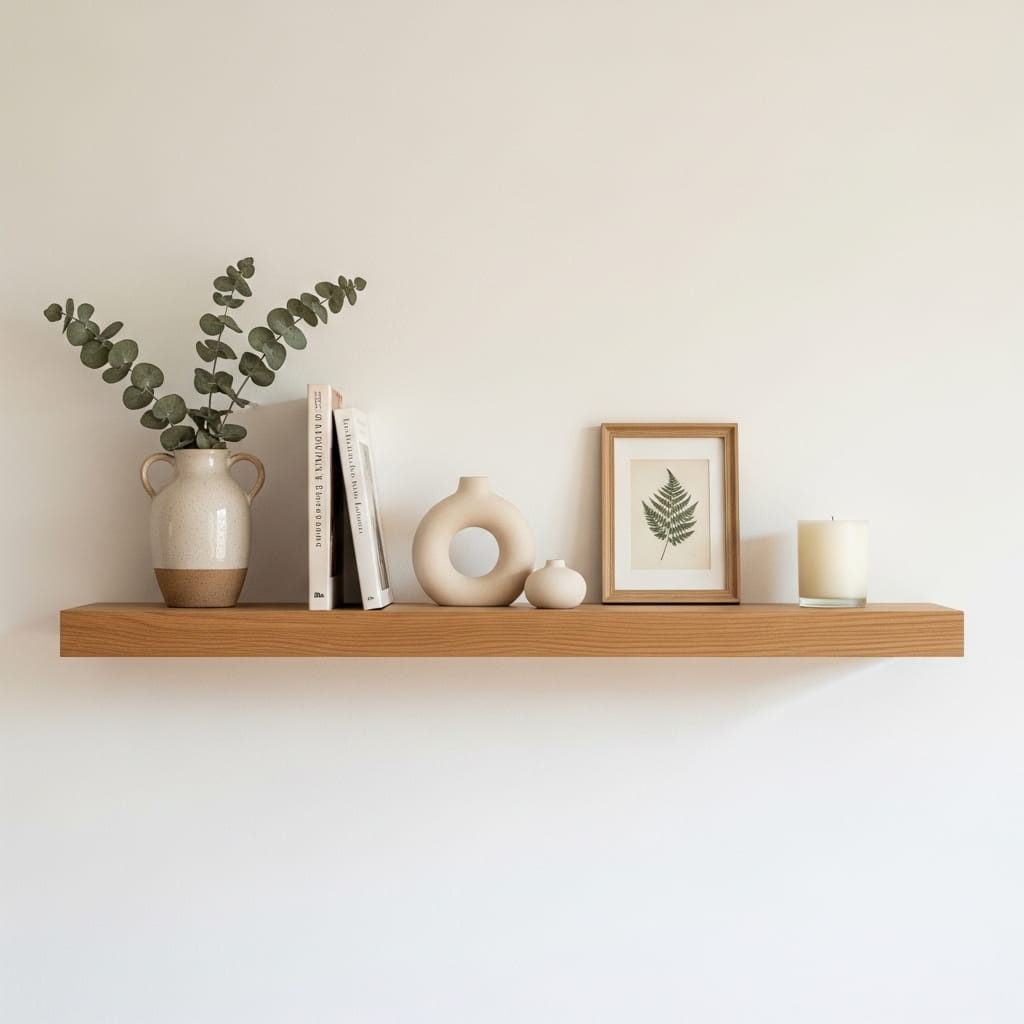
A single floating shelf styled with exactly 5 carefully chosen objects — and generous empty space deliberately left between each object — creates a more visually sophisticated and expensive-looking display than a shelf crowded with 15 to 20 accessories ever achieves. Restraint is the single most powerful styling technique available to any home decorator — and experienced interior designers consistently confirm that editing a shelf down to 5 intentionally selected objects communicates confident, decisive design taste that overcrowded shelves fundamentally undermine. Furthermore, the negative space between objects allows each individual piece to be seen and appreciated fully — preventing the visual competition that makes crowded shelves feel chaotic rather than curated. Moreover, varying the 5 objects across height, material, and texture creates maximum visual interest within a beautifully minimal arrangement.
- Negative shelf space communicates confident design restraint
- 5 objects create sophisticated minimal shelf story
- Varying heights add visual rhythm across shelf
- Mixed textures deliver richness within minimal palette
- Edited shelf styling signals expensive curated taste
Selecting the specific 5 objects for a minimalist shelf arrangement requires applying the material diversity rule that ensures the shelf display delivers maximum visual interest within a deliberately restrained object count. Choose exactly 1 object from each of 5 different material categories — ceramic, natural botanical, paper or printed art, metal or stone, and textile or organic fiber. Moreover, this 5-material selection strategy guarantees that every object on the shelf contributes a distinct visual and tactile element — preventing the monotonous single-material appearance that makes even carefully edited shelves look unintentionally sparse rather than deliberately minimalist. Additionally, arranging the 5 objects in a loose diagonal line across the shelf rather than clustering them together at the center creates a natural visual flow that draws the eye smoothly from one end of the shelf to the other.
Linen Roman Shades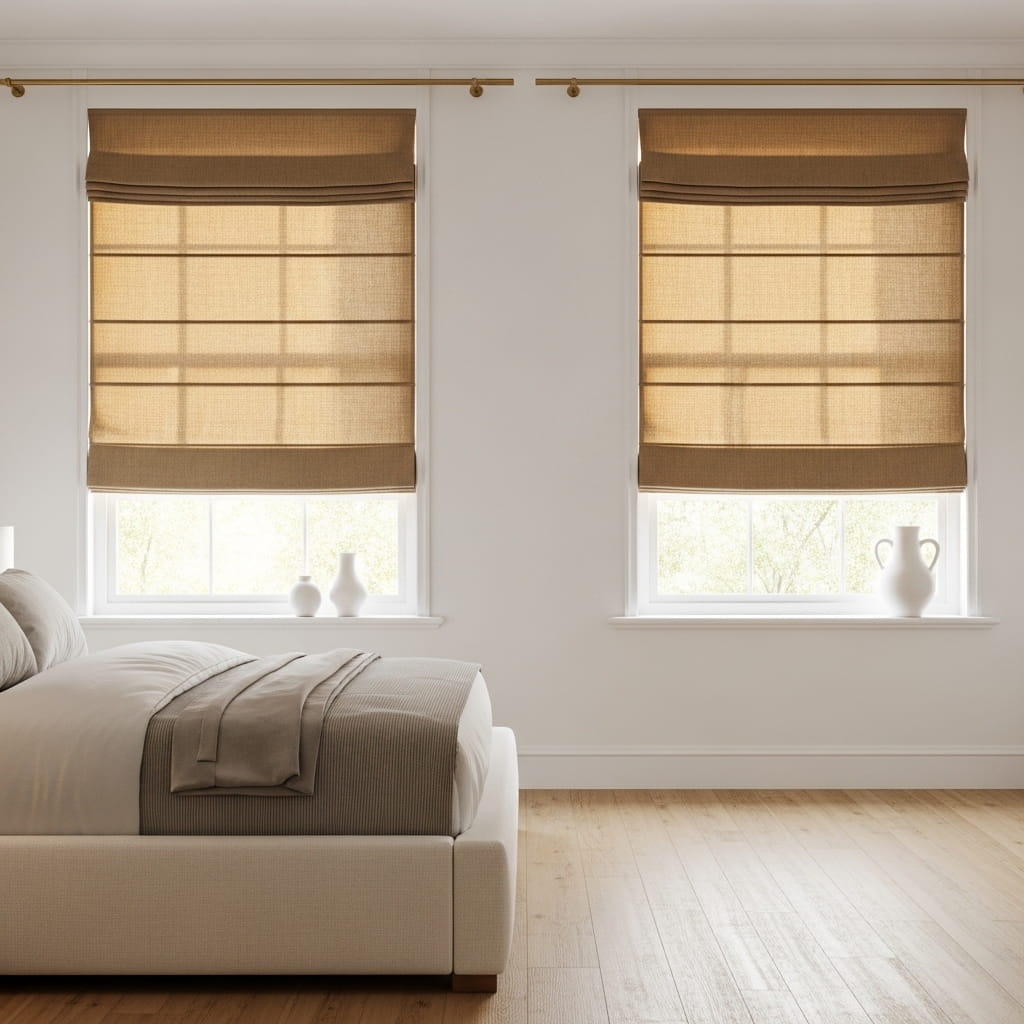
Natural linen Roman shades installed on bedroom or living room windows instantly replace the cluttered, casual appearance of standard fabric curtains with a clean, architectural window treatment that communicates tailored, high-end interior design sensibility. Roman shades fold into neat horizontal pleats when raised — creating a structured, precise window profile that signals genuine custom window treatment quality rather than off-the-shelf retail solutions. Furthermore, oatmeal linen Roman shades filter natural light with a warm, diffused softness that transforms harsh afternoon sunlight into a gentle, flattering interior glow throughout every room they dress. Moreover, linen Roman shades suit minimalist, transitional, Japandi, and modern farmhouse interior styles simultaneously — making them one of the most versatile window treatment investments available. Additionally, custom linen shades cost between $45 and $90 per window.
- Linen Roman shades deliver tailored architectural elegance
- Folded pleats create clean structured window profile
- Oatmeal linen filters warm diffused natural light
- Suits minimalist, Japandi, and farmhouse styles equally
- Custom linen shades cost $45–$90 per window
Measuring windows accurately for custom linen Roman shades requires taking 3 separate width measurements and 3 separate height measurements at different points across each window opening — window frames in most homes are not perfectly square, and using a single measurement consistently produces shades that gap on one side or bind on the other. Measure the window width at the top, middle, and bottom of the opening — use the narrowest measurement for inside-mount shades to ensure smooth operation without binding. Moreover, measure the window height on the left side, center, and right side — use the longest measurement for inside-mount shades to ensure complete coverage without light gaps at the bottom. Additionally, adding 3 inches of overlap beyond the window frame on all 4 sides for outside-mount Roman shades creates a fuller, more generously proportioned window treatment that looks significantly more luxurious than a precisely frame-sized installation.
Woven Texture Wall Hanging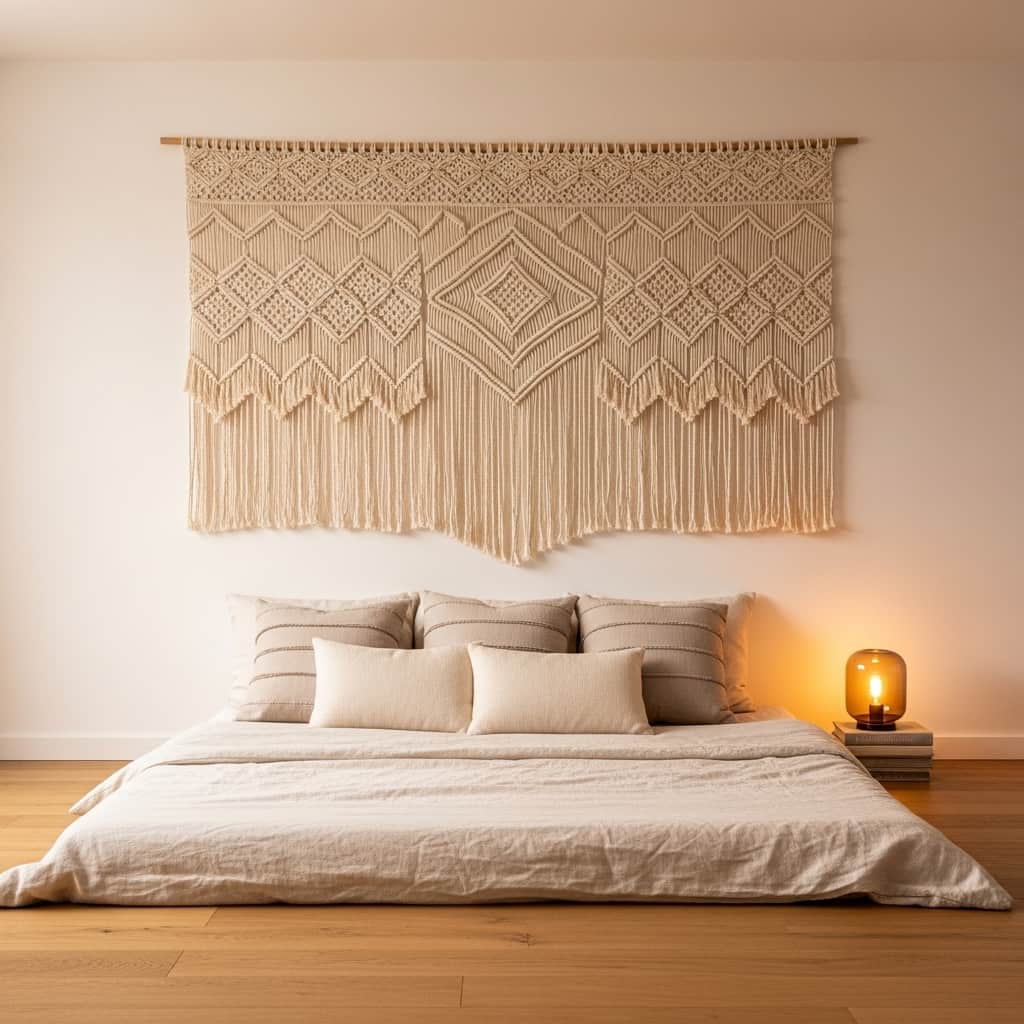
A large woven macrame or textile tapestry hung as the primary wall focal point above a bed or sofa delivers a level of organic textural warmth and handcrafted visual richness that no framed art print or painted wall treatment replicates — because woven fiber introduces genuine three-dimensional depth that projects physically from the wall surface. Handwoven wall hangings communicate artisan craftsmanship, slow design intentionality, and material authenticity — qualities that characterize genuinely collected, experience-driven home interiors rather than mass-produced decorated spaces. Furthermore, a large macrame wall hanging with a geometric diamond pattern and long fringe bottom creates a dramatic floor-to-near-ceiling vertical focal point that transforms a plain bedroom wall into a fully designed architectural feature. Moreover, natural cotton macrame wall hangings cost between $35 and $95 depending on size.
- Woven macrame adds organic three-dimensional wall depth
- Handcrafted fiber communicates artisan design authenticity
- Large format creates dramatic bedroom wall focal point
- Natural cotton texture warms any neutral wall palette
- Macrame wall hangings cost between $35 and $95
Hanging a large woven macrame wall hanging so it sits centered, level, and securely anchored requires addressing the specific weight and hanging hardware requirements that fiber wall art demands differently from framed prints. Large macrame pieces often weigh between 3 and 8 pounds — significantly heavier than most decorative wall art — and require wall anchors rated for at least 15 pounds rather than standard picture-hanging strips. Moreover, hanging macrame from a decorative wooden dowel rod rather than directly from a nail creates a clean, finished top edge that frames the piece professionally — the visible wooden dowel becomes part of the aesthetic rather than a purely functional mounting solution. Additionally, centering the dowel rod so equal amounts of macrame hang on both sides requires measuring the dowel’s midpoint and aligning it with a level pencil mark at the exact horizontal center of your intended wall position before driving any hardware.
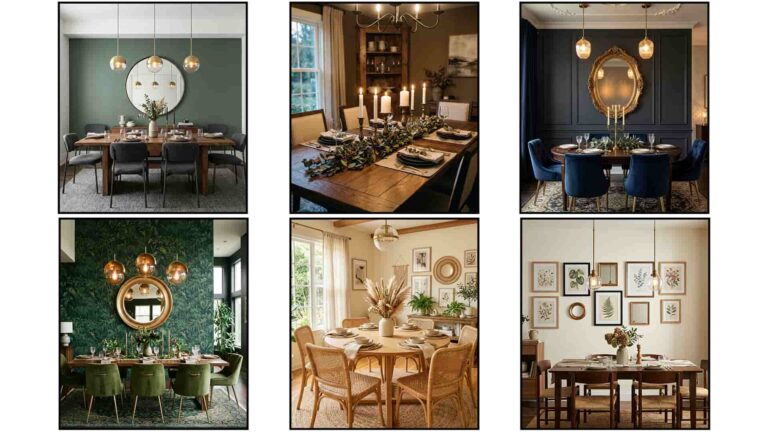
Dark Accent Wall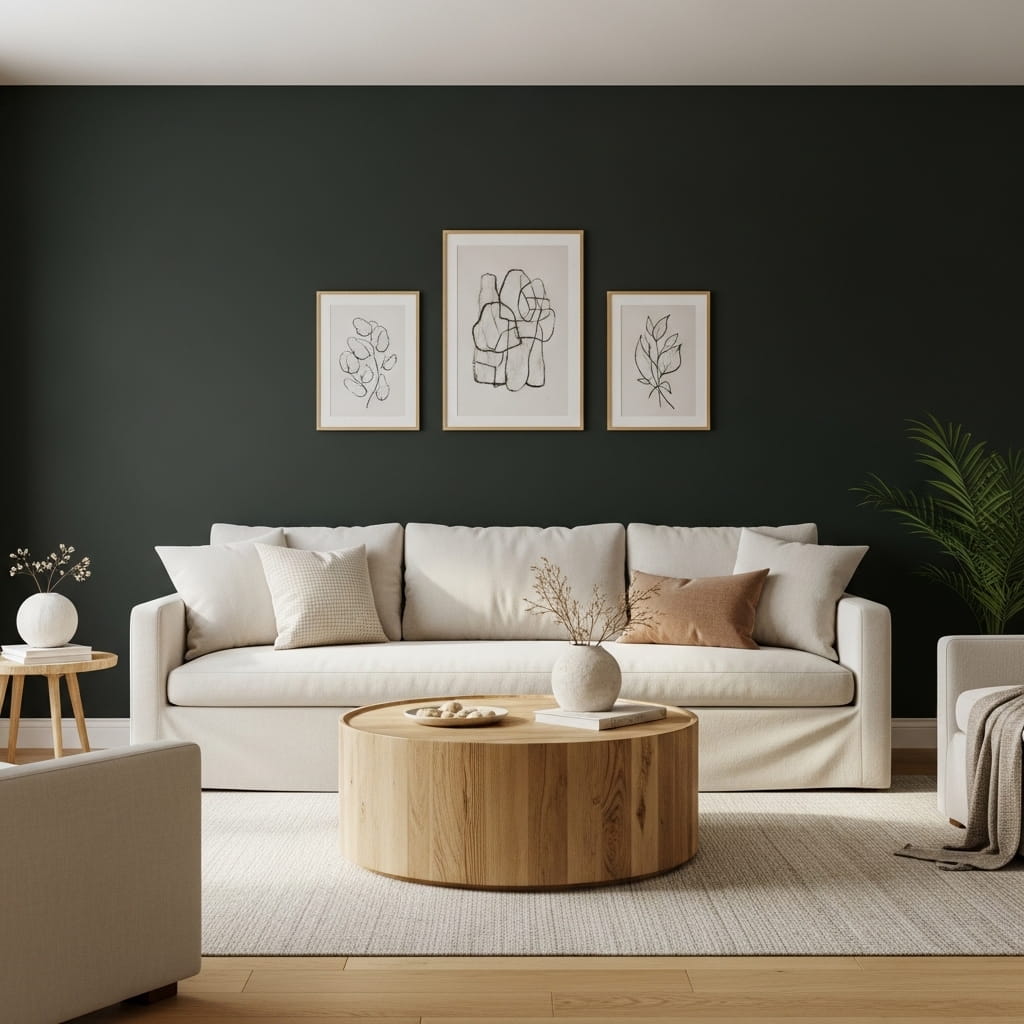
Painting a single living room, bedroom, or dining room wall in deep forest green, charcoal gray, or navy blue creates one of the most transformatively dramatic and luxuriously sophisticated room upgrades achievable for under $40 in paint — and a dark accent wall genuinely photographs like a professionally designed interior the moment the paint dries. Dark accent walls work by creating a deeply saturated backdrop that makes every object placed in front of it — sofa, art, shelving, or furniture — appear more vivid, more intentional, and more visually significant than the same objects appear against a plain white wall. Furthermore, deep forest green specifically pairs beautifully with cream linen, natural wood, and aged brass — the 3 most prevalent materials in contemporary home interiors. Moreover, this single-wall approach limits paint consumption to under 1 gallon.
- Dark accent wall creates instant designer room drama
- Forest green pairs beautifully with brass and linen
- Objects appear more vivid against dark saturated backdrop
- Single accent wall costs under $40 in paint
- Dark wall makes every room photograph luxuriously
Choosing the correct dark accent wall color for your specific living room requires evaluating the room’s natural light levels before selecting between forest green, charcoal gray, navy blue, or deep burgundy as your dark tone. North-facing rooms receive cool, indirect natural light throughout the day — choosing a warm dark tone like deep forest green or burgundy in these rooms prevents the wall from reading as cold, flat, and depressing under cool light conditions. Moreover, south-facing rooms receive warm, direct natural light — these rooms suit cooler dark tones like charcoal gray or navy blue beautifully, as the warm sunlight prevents cool dark tones from feeling heavy. Additionally, always apply a dark accent wall paint color in 2 full coats with 24 hours of drying time between coats — dark pigments require complete coverage to achieve the rich, even saturation that makes the accent wall look professionally painted rather than streaky and under-pigmented.
Tray Ceiling Paint Detail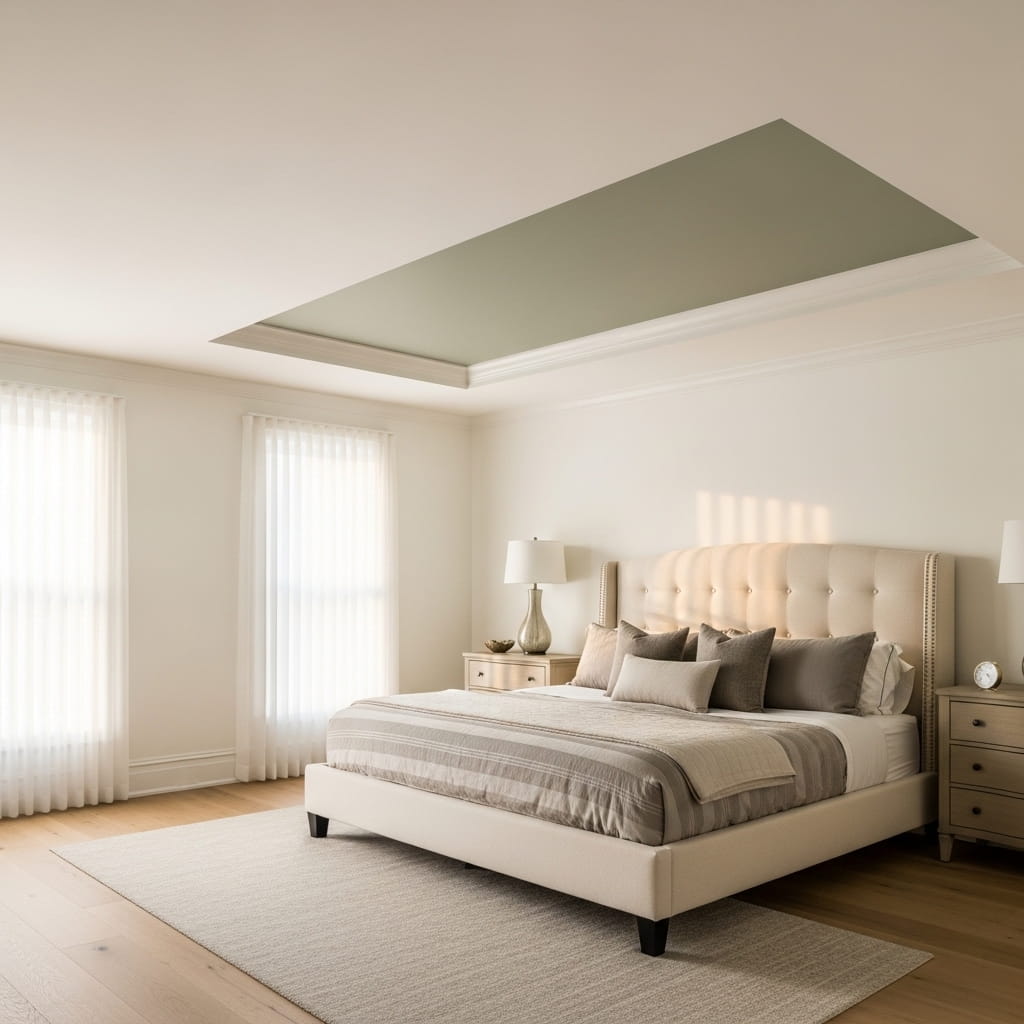
Painting the recessed inner section of a tray ceiling in a contrasting warm greige or soft sage green — while leaving the outer ceiling border bright white — creates one of the most architecturally significant and genuinely expensive-looking ceiling treatments achievable with a single can of paint and a weekend afternoon. Tray ceiling paint details communicate custom architectural construction quality because they visually mimic the layered ceiling profiles found exclusively in high-end custom-built homes — creating the perception of built-in architectural investment that most standard homes lack entirely. Furthermore, the subtle color contrast between the warm inner tray and the bright white outer border creates gentle architectural shadow and depth that makes the ceiling feel actively designed rather than simply painted. Moreover, this upgrade costs under $25 in paint and requires zero construction work.
- Tray ceiling paint mimics custom architectural luxury
- Contrasting inner color creates subtle ceiling depth
- Warm greige tone suits every bedroom wall palette
- Zero construction work required for ceiling upgrade
- Complete ceiling detail costs under $25 total
Creating a clean, perfectly straight paint line between the tray ceiling inner section and the outer white border requires using a specific painter’s tape application technique that prevents paint bleeding along the ceiling transition edge — the most common mistake that produces a wavy, amateurish ceiling paint line. Apply painter’s tape along the transition edge from the outer to inner ceiling section. Moreover, immediately after pressing the tape firmly onto the ceiling surface, run a thin bead of the outer white paint color directly along the tape edge and allow it to dry completely for 20 minutes before applying the contrasting tray color. This white paint seal fills any microscopic gaps between the tape and ceiling texture — ensuring the subsequent contrasting color layer produces a perfectly crisp, clean transition line rather than bleeding beneath the tape edge.
Candle Cluster Styling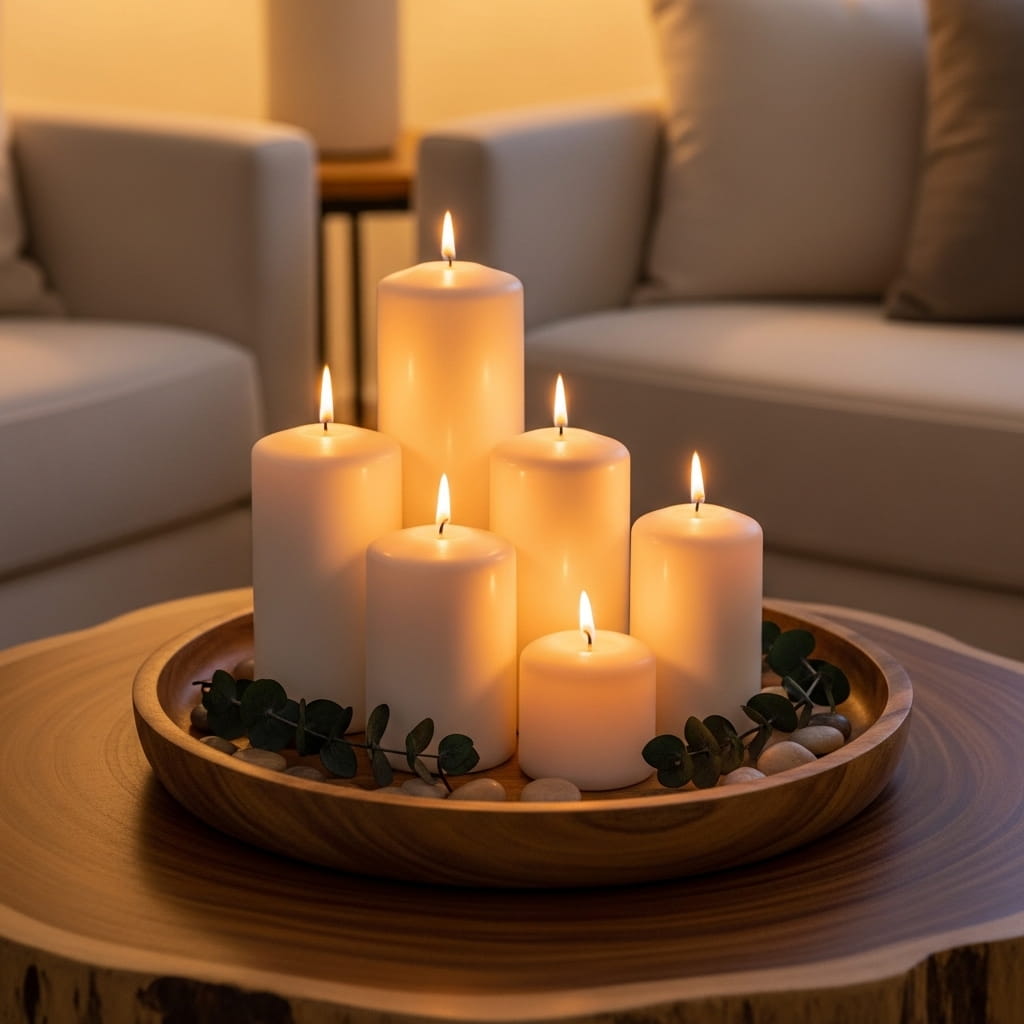
Five white pillar candles in graduated heights arranged on a round natural wood tray — surrounded by dried eucalyptus sprigs and smooth river stones — create the warmest, most atmospherically intimate living room ambiance achievable from under $30 in materials, transforming any standard coffee table into a glowing, beautifully styled focal point. Candle clusters work because multiple warm flame light sources positioned at slightly different heights create a layered, flickering light environment that single candles or electric lamps cannot replicate — the combined glow fills the entire lower half of the room with warm, dancing amber light that makes every interior feel genuinely luxurious after dark. Furthermore, graduated candle heights create a naturally dynamic silhouette within the tray. Moreover, white pillar candles coordinate with every existing home color palette effortlessly.
- Graduated candle heights create dynamic glowing silhouette
- Multiple flames deliver intimate warm amber atmosphere
- Natural wood tray unifies the candle cluster beautifully
- Dried eucalyptus adds fresh green botanical accent
- Entire candle cluster display costs under $30 total
Arranging 5 pillar candles in a tray cluster so the grouping looks intentionally composed rather than randomly placed requires applying the height distribution principle that visual stylists use when composing multi-object tray arrangements for professional home photography. Position the tallest candle slightly off-center toward the back of the tray rather than dead center — placing the tallest element at the exact center creates a symmetrical, static arrangement that lacks the organic visual movement of a professionally styled cluster. Moreover, grouping the 3 medium-height candles in a loose triangular formation around the tall back candle — with the 2 shortest candles placed toward the front tray edge — creates a naturally cascading height sequence that draws the eye from front to back across the entire tray arrangement. Additionally, using LED flameless pillar candles rather than real flame candles on a wooden coffee table eliminates fire risk while delivering an identical warm amber visual glow.
Natural Wood Side Table
A live-edge solid walnut side table positioned beside a sofa delivers the most organically sculptural and materially authentic furniture accent available for a living room — the irregular natural wood edge communicates genuine artisan craftsmanship and material rarity that no mass-produced side table replicates regardless of price point. Live-edge wood furniture specifically signals expensive, custom-quality interior design because each piece is entirely unique — no 2 live-edge tables share the same edge profile, grain pattern, or natural color variation, making every piece an inherently one-of-a-kind acquisition. Furthermore, the deep walnut grain and warm brown tone pair beautifully with cream linen, white ceramic, and aged brass accessories that characterize contemporary luxury home interiors. Moreover, affordable live-edge side tables cost between $75 and $150 at local woodworking markets and online artisan platforms.
- Live-edge walnut communicates genuine artisan craftsmanship
- Unique natural edge makes each table entirely one-of-a-kind
- Deep walnut grain pairs beautifully with cream linen
- Organic wood adds warm sculptural living room accent
- Affordable live-edge tables cost $75–$150 total
Styling a live-edge wood side table so the natural organic edge remains clearly visible and appreciated as the table’s primary design feature requires keeping the table surface styling deliberately minimal — no more than 2 to 3 small objects placed toward the table’s interior edge, leaving the dramatic live edge completely unobstructed and visible from the sofa seating position. Furthermore, positioning the live edge facing outward toward the room rather than pushed against the sofa arm ensures every person seated on the sofa and every person entering the room sees the dramatic natural edge profile immediately. Moreover, applying a thin coat of food-safe wood oil to the live-edge surface every 3 to 4 months maintains the deep, rich walnut color and prevents the natural wood from drying out and developing a pale, faded surface appearance that diminishes the table’s visual impact over time.
Painted Interior Doors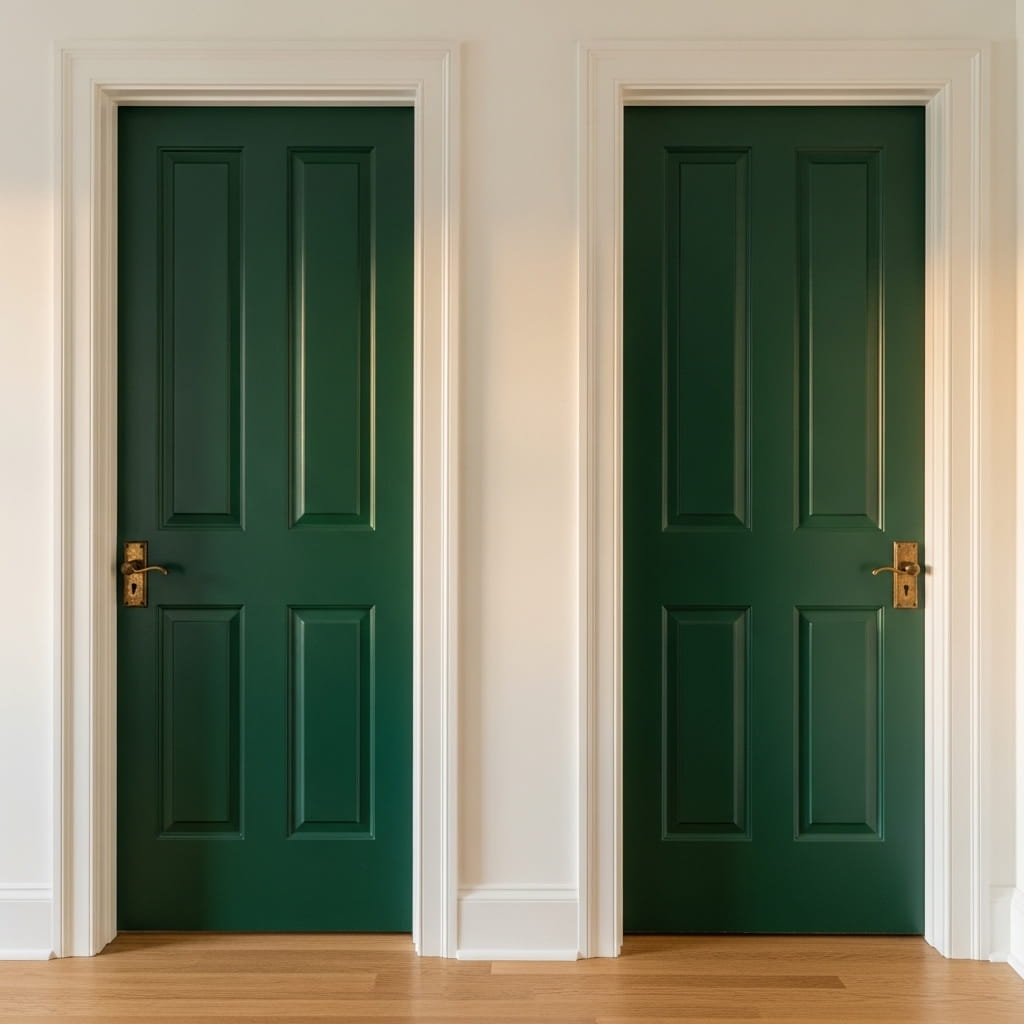
Painting every interior door in your home from standard builder-white to deep forest green, charcoal gray, or navy blue creates one of the most dramatically impactful and unexpectedly sophisticated whole-home upgrades achievable over a single weekend — transforming a generic builder-grade interior into a curated, design-forward home that commands immediate admiration. Interior door color is one of the most consistently underutilized design opportunities in residential spaces — most homeowners paint walls and furniture but leave doors in the default white that communicates zero design intention. Furthermore, the sharp contrast between a deep forest green door and a bright white door frame creates an architectural graphic detail that makes every doorway in the home feel intentionally designed. Moreover, painting all interior doors in a single consistent color creates a cohesive, whole-home design thread. Additionally, 1 gallon of paint covers 4 to 5 standard interior doors.
- Painted interior doors transform generic builder homes instantly
- Deep green and white frame creates sharp graphic contrast
- Consistent door color creates cohesive whole-home design
- One paint gallon covers 4 to 5 doors completely
- Painted doors communicate strong design intention immediately
Painting interior doors so the finished surface looks smooth, professional, and completely brush-stroke-free requires using a small foam roller rather than a standard paint brush for every flat door panel surface. Foam rollers apply paint in a thin, even layer that dries without the visible brush texture that bristle brushes leave on smooth door surfaces — brush texture on painted doors is the single most obvious indicator of amateur painting technique. Moreover, applying 3 thin coats of paint rather than 2 thick coats prevents drips, sags, and uneven color saturation that plague thick paint applications on vertical door surfaces. Additionally, removing each door from its hinges and painting it horizontally on sawhorses rather than vertically in place eliminates the gravity-driven paint drips that consistently mar the finish quality of vertically painted interior doors.
Herringbone Entryway Tile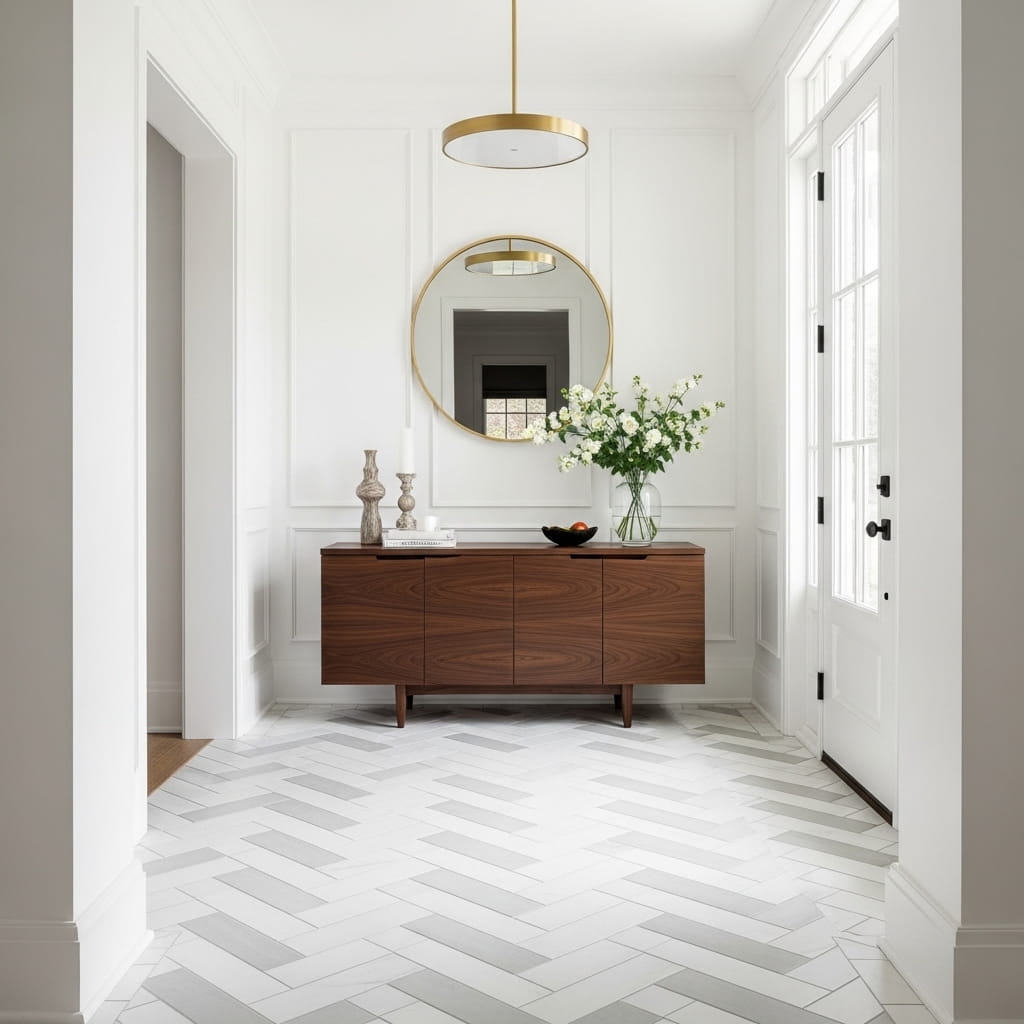
A herringbone tile pattern installed in an entryway floor — even covering as little as 25 square feet — creates one of the most powerfully luxurious and architecturally distinctive first impressions achievable in any home, signaling custom design investment from the very first step inside. The herringbone pattern specifically communicates expensive flooring because its diagonal, interlocking brick arrangement requires significantly more precise installation skill and labor time than standard straight-lay tile — making the pattern a universally recognized marker of quality craftsmanship investment. Furthermore, white and light gray herringbone ceramic tile coordinates with virtually every entryway wall color, console table finish, and door hardware tone. Moreover, affordable ceramic herringbone tile costs between $2 and $5 per square foot — making a 25-square-foot entryway installation cost between $50 and $125 in materials alone.
- Herringbone pattern signals custom installation luxury quality
- Diagonal brick pattern communicates skilled craftsmanship investment
- White and gray tile suits every entryway color palette
- 25-square-foot entryway tile costs $50–$125 total
- Herringbone floor creates powerful luxurious first impression
Installing herringbone floor tile in an entryway requires establishing a perfectly centered layout line before placing a single tile — the diagonal orientation of herringbone pattern makes off-center starting points dramatically more visually obvious than standard straight-lay tile installations where minor centering errors remain largely invisible. Find the exact center point of the entryway floor and snap a chalk line running from the front door threshold to the interior doorway. Moreover, dry-lay the first 3 rows of herringbone tile along this center line without adhesive — this dry layout reveals any centering corrections needed before permanent installation commits the pattern to an incorrect position. Additionally, using a tile wet saw rather than a manual tile cutter for all diagonal edge cuts ensures the precise, clean cut angles that herringbone pattern edges require — manual tile cutters produce irregular, chipped diagonal cuts that make herringbone edges look unfinished and amateurish.
Decluttered Open Shelving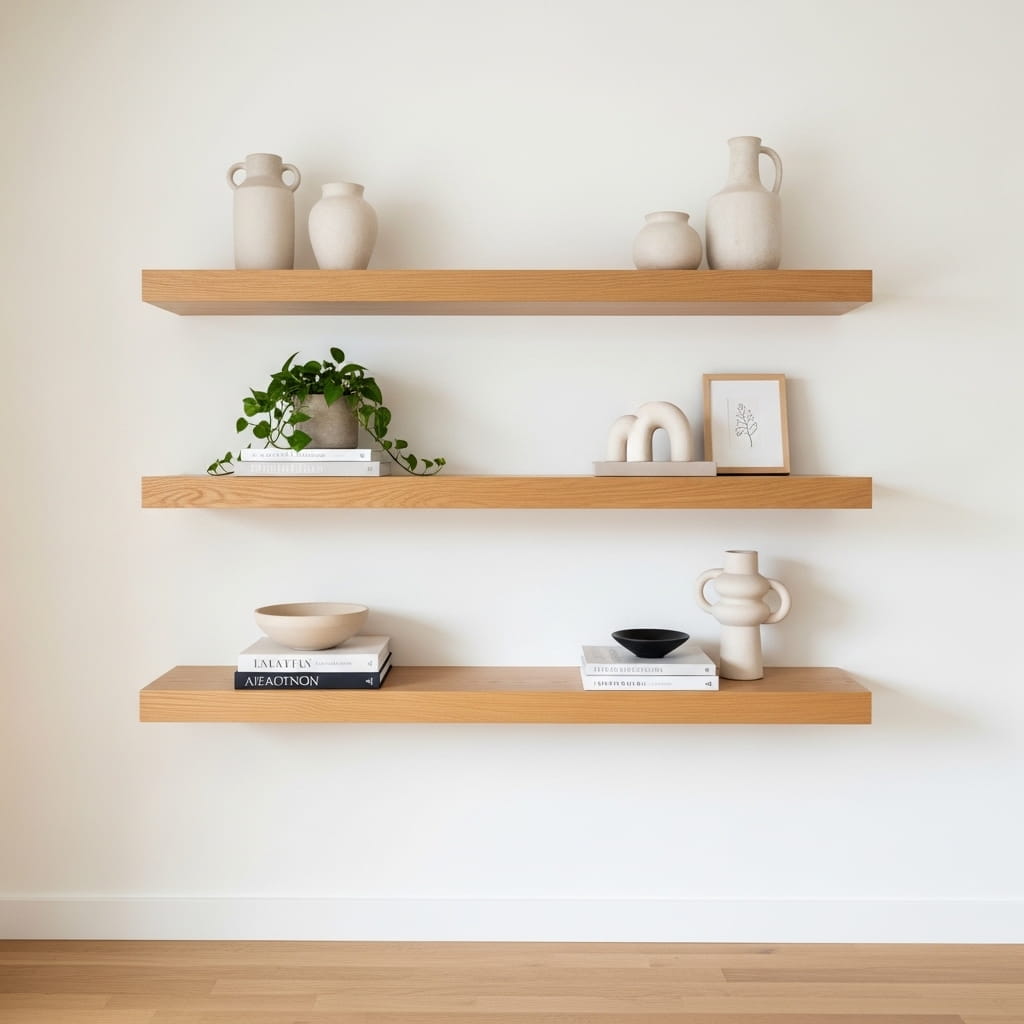
Ruthlessly editing open shelves down to exactly 6 intentionally chosen objects — with generous empty space deliberately preserved between every piece — creates the single most powerful visual transformation available to any homeowner without purchasing a single new item. Cluttered shelves are the most common reason beautifully furnished homes photograph poorly and feel visually chaotic despite expensive furniture investments — and removing 70 percent of shelf objects immediately makes every remaining piece look significantly more valuable, intentional, and deliberately collected. Furthermore, the empty space between objects allows natural light to move freely across the shelf surface, creating gentle shadow variations that add depth and dimension to the display. Moreover, I’ve seen this single editing exercise completely transform the perceived quality of a living room within 30 minutes of work.
- Editing shelves to 6 objects creates instant luxury
- Empty shelf space makes each object appear valuable
- Decluttered shelves photograph dramatically better immediately
- Natural light moves freely across edited shelf surfaces
- Zero cost transformation takes under 30 minutes total
Deciding which 6 objects deserve to remain on an edited open shelf requires applying the 3-question test that professional home stagers use when preparing properties for high-end real estate photography and luxury market listings. Ask 3 questions about every object currently on your shelf — does this object have genuine visual beauty, does this object contribute a unique material or texture not already represented by another shelf object, and does this object coordinate with the room’s existing color palette. Moreover, any object that fails even 1 of these 3 questions goes immediately into a storage box rather than back onto the shelf — no exceptions. Additionally, reassessing the shelf edit every 4 to 6 weeks and replacing 1 to 2 objects with fresh seasonal or botanical elements keeps the edited shelf display feeling current, alive, and genuinely curated rather than permanently static.
Sconce Wall Lighting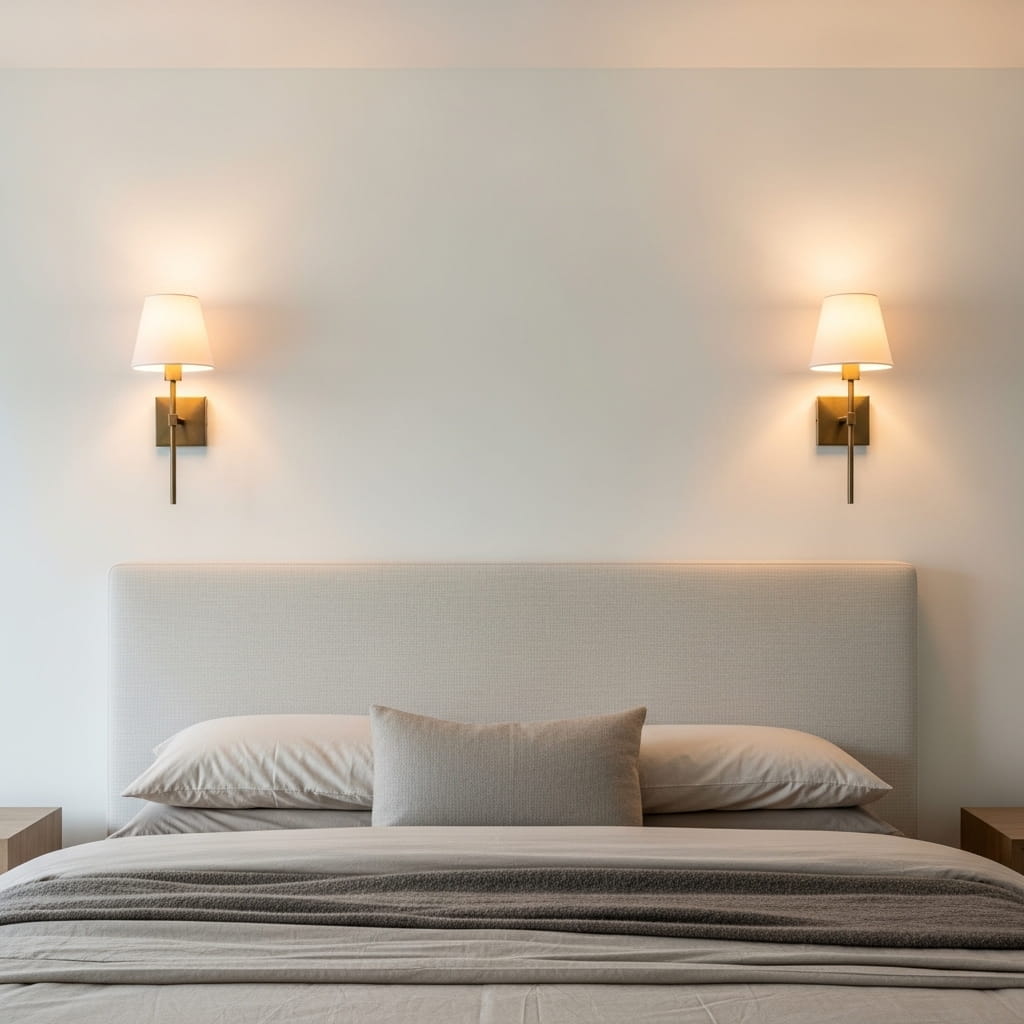
Two matching aged brass wall sconces with small linen drum shades mounted symmetrically above a bed headboard or sofa deliver a level of architectural lighting sophistication that immediately elevates any bedroom or living room from standard residential to genuinely boutique hotel quality. Wall sconces replace bedside table lamps — freeing the nightstand surface from lamp base clutter and creating a clean, architecturally integrated lighting solution that signals custom, professionally designed interior work. Furthermore, the warm amber glow from 2 symmetrically placed sconces creates a beautifully balanced, soft evening light environment that flatters every interior surface it illuminates. Moreover, hardwired wall sconces require an electrician, but plug-in sconce versions achieve an identical visual result without any electrical work — costing between $45 and $90 per pair.
- Wall sconces deliver boutique hotel bedroom lighting quality
- Symmetrical placement creates balanced architectural elegance
- Sconces free nightstand surface from lamp base clutter
- Plug-in versions require zero electrical work installation
- Sconce pairs cost between $45 and $90 total
Installing plug-in wall sconces so the electrical cord remains invisible and the installation looks genuinely hardwired requires using a specific cord concealment technique that most homeowners overlook entirely when first installing plug-in lighting. Purchase a plastic cord cover channel in a color matching your wall paint — these slim plastic channels adhere directly to the wall surface and completely enclose the plug-in cord from sconce base to baseboard outlet. Moreover, painting the cord cover channel the exact same color as your wall paint after installation makes the channel virtually invisible at normal viewing distances — creating the seamless, hardwired appearance that makes plug-in sconces look professionally installed rather than temporarily placed. Additionally, routing the cord downward from the sconce base toward the floor rather than horizontally across the wall creates the most visually logical and architecturally convincing cord path that genuinely mimics hardwired electrical installation.
Monochromatic Room Palette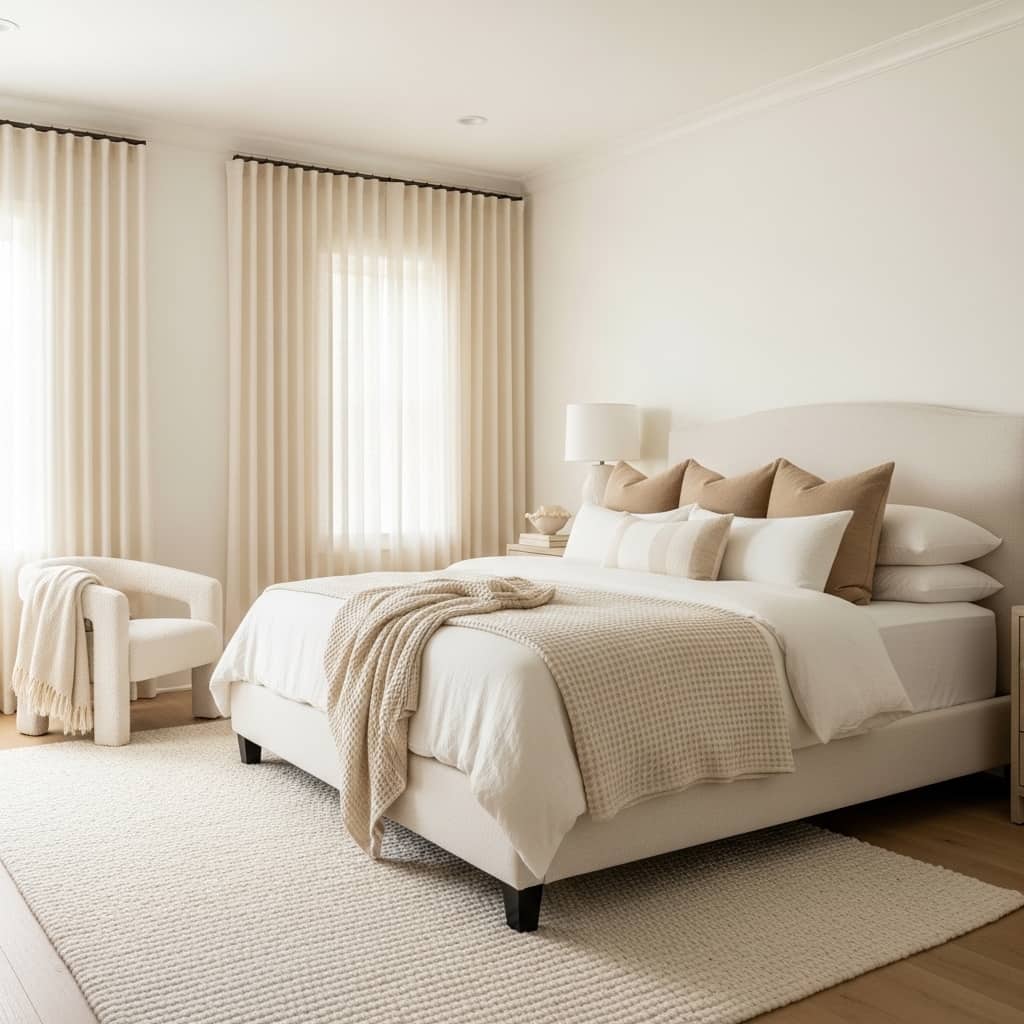
A fully monochromatic bedroom styled entirely in cream, oatmeal, and warm white tones — with 5 different textures layered across bedding, curtains, rugs, chairs, and pillows — creates the most serenely sophisticated and visually unified room aesthetic achievable, and consistently ranks as one of the most shared and saved interior styles across every major home decor platform. Monochromatic rooms look genuinely expensive because the deliberate single-palette commitment communicates design confidence and restraint that multi-color rooms rarely convey — it takes genuine styling skill to make a room feel richly layered and visually interesting using only 1 color family. Furthermore, the texture variety — waffle weave, linen, bouclé, knit, and wool — creates all the visual interest the room requires within a perfectly unified color story. Moreover, this approach suits every room size.
- Monochromatic palette communicates confident design restraint
- 5 different textures create richness within one color
- Cream and oatmeal tones feel warm and luxurious
- Single palette rooms photograph stunningly on Pinterest
- Monochromatic styling suits every room size equally
Building a genuinely beautiful monochromatic cream bedroom requires sourcing textiles across at least 5 distinct texture categories — because texture variation within a single color palette is the only tool available for creating visual depth in a room that intentionally eliminates color contrast as a design element. Source 1 smooth woven texture — linen curtain panels. Source 1 looped texture — bouclé accent chair or pillow. Source 1 ribbed texture — knit throw or lumbar pillow. Source 1 dimensional texture — waffle weave duvet cover. Moreover, source 1 flat woven texture — wool area rug. Additionally, ensuring each textile sits within the same warm cream and oatmeal color temperature — avoiding cool whites and stark bright whites that introduce color temperature contrast — maintains the seamless, unified warmth that makes a monochromatic cream room feel genuinely cohesive rather than accidentally mismatched across different white tones.
Decorative Ladder Display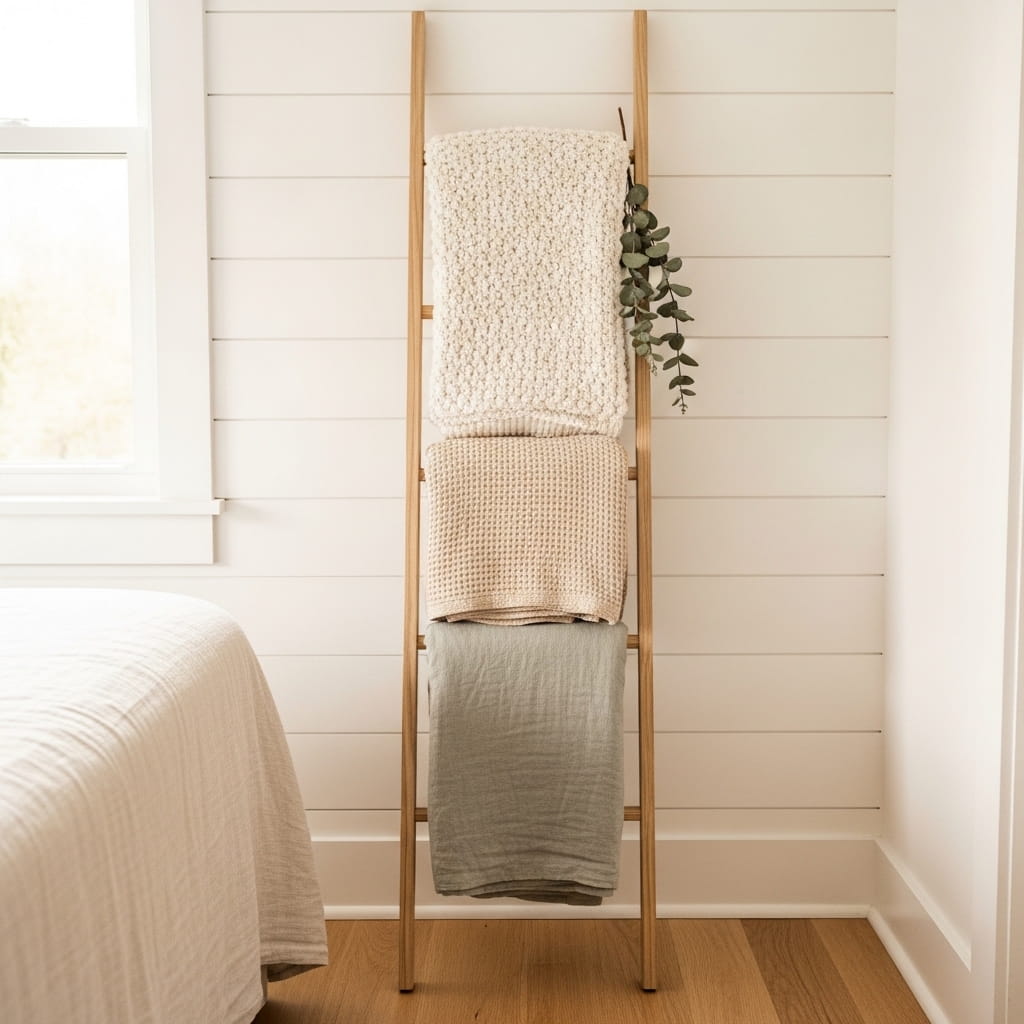
A slim natural wood blanket ladder leaning casually against a bedroom or bathroom wall — holding 3 beautifully folded throws in cream chunky knit, oatmeal waffle weave, and soft sage linen — creates one of the most effortlessly elegant and practically functional decorative accents available for any home at any budget level. Blanket ladders solve a real daily home organization problem — keeping throws accessible, visible, and beautifully displayed rather than stuffed in a basket or draped messily over furniture — while simultaneously serving as a genuine decorative element that adds warm, organic wood texture to any wall it leans against. Furthermore, the 3 folded throws at different rung heights create a naturally graduated vertical textile display that draws the eye upward. Moreover, natural wood ladders cost between $25 and $55.
- Blanket ladder solves throws storage beautifully
- Folded textiles create graduated vertical wall display
- Natural wood adds warm organic bedroom texture
- Ladder suits bedroom, bathroom, and living room walls
- Natural wood ladders cost between $25 and $55
Folding throws on a decorative blanket ladder so each textile looks beautifully neat, intentional, and visually distinct from the others requires using a specific folding technique that displays a generous portion of each throw’s texture and color rather than hiding the fabric’s best visual qualities inside a tightly folded bundle. Fold each throw in thirds lengthwise — creating a long, narrow band that exposes the full length of the textile’s surface texture. Moreover, drape each folded throw over its designated rung by centering it across the rung and allowing both ends to hang at equal length on either side — the hanging ends should reach approximately 8 to 10 inches below the rung to display the throw’s full texture generously. Additionally, spacing each throw-draped rung at least 10 inches apart vertically ensures the hanging ends of the upper throw do not overlap with the rung below — keeping each textile clearly visible and individually appreciable as a distinct textural element.
Statement Ceiling Fixture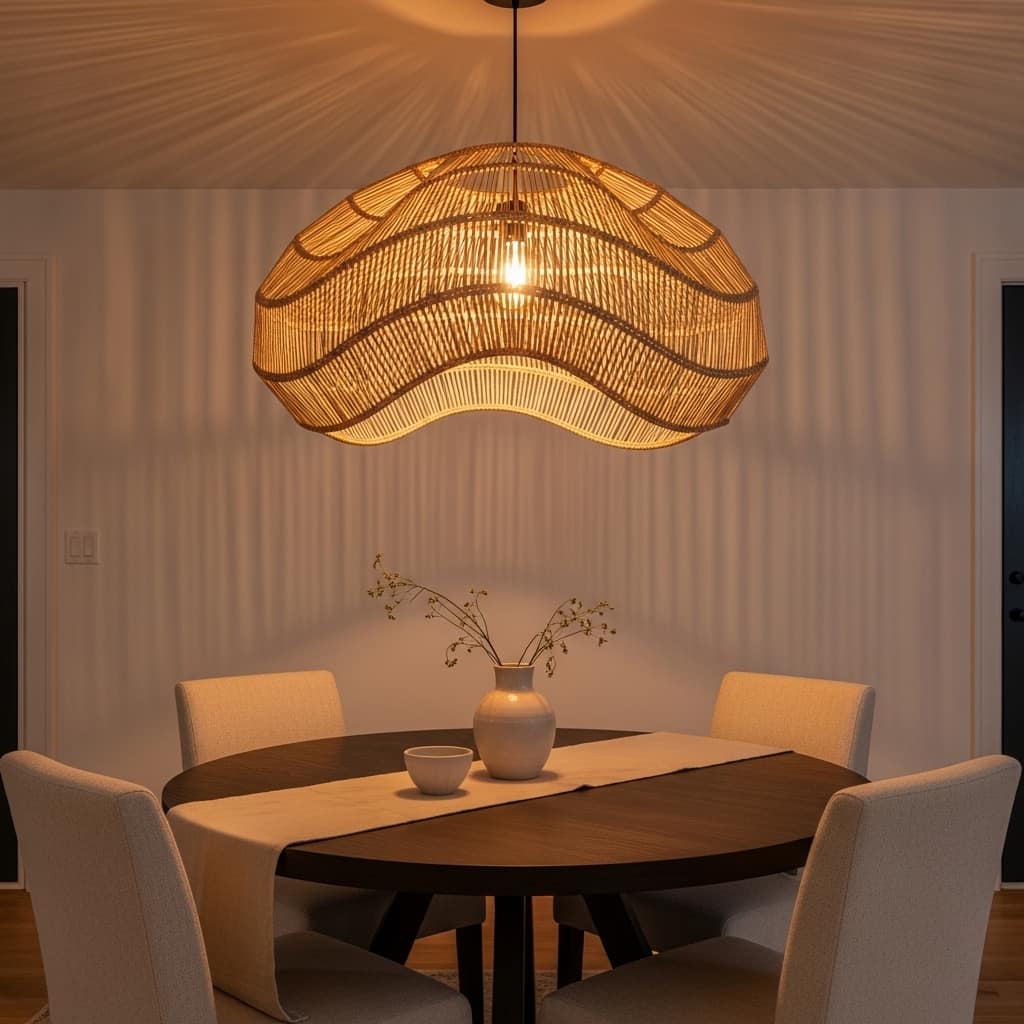
A single large sculptural rattan pendant light — 24 inches in diameter — hung centered above a dining table or living room seating area delivers more immediate room-transforming impact than any wall treatment, furniture upgrade, or accessory collection achievable at a comparable price point. Ceiling fixtures are the single most overlooked decorating opportunity in most homes — the majority of homeowners live for years beneath builder-grade flush-mount ceiling lights that communicate zero design intention and actively undermine the quality of every other decorating investment in the room beneath them. Furthermore, a large rattan pendant introduces warm organic texture at ceiling level — a dimension most decorating approaches ignore entirely — creating a complete top-to-bottom designed room environment. Moreover, rattan pendant lights cost between $45 and $120 and install in under 30 minutes.
- Statement pendant transforms entire room atmosphere instantly
- Rattan texture adds warm organic ceiling-level interest
- Large 24-inch diameter creates bold visual focal point
- Builder-grade ceiling lights undermine every room investment
- Rattan pendants cost between $45 and $120 total
Replacing a builder-grade ceiling light with a large rattan pendant requires confirming 2 electrical compatibility factors before purchasing the new fixture — ceiling box weight rating and canopy diameter compatibility with your existing ceiling junction box. Most standard ceiling junction boxes support fixtures weighing up to 35 pounds — confirm your ceiling box weight rating by checking the stamp inside the box before purchasing any pendant fixture. Moreover, choosing a pendant with a canopy diameter between 5 and 6 inches ensures the canopy covers the ceiling junction box completely regardless of minor positioning variations during installation — canopies smaller than 4 inches frequently expose the ceiling box edges, creating an unfinished installation appearance. Additionally, installing a dimmer switch compatible with your new pendant fixture allows adjustable light levels between bright functional dining illumination and soft atmospheric evening ambiance — the dimming capability multiplies the fixture’s decorating versatility enormously.
Curated Coffee Table Vignette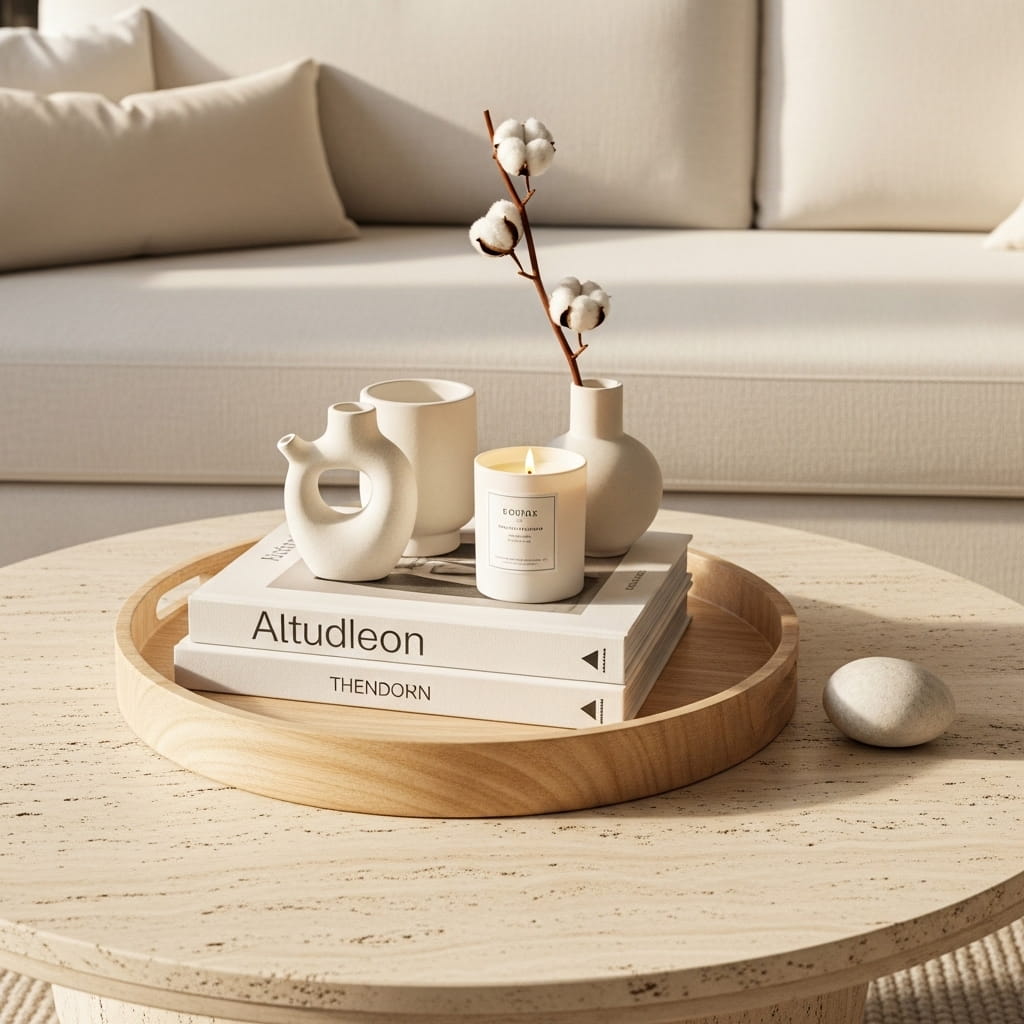
A perfectly composed coffee table vignette — a round natural wood tray holding 2 art books, a sculptural ceramic object, a soy candle, and a dried cotton stem bud vase on a travertine stone table — represents the complete, final expression of how to make a home feel expensive through intentional, layered accessory styling rather than expensive furniture purchases alone. The coffee table vignette is the most photographed and Pinterest-saved decorating element in any living room — because it concentrates 4 to 5 carefully chosen objects within a tightly defined tray boundary, creating a miniature designed environment that reads as beautifully luxurious at every viewing scale from across the room to direct close-up. Furthermore, the travertine stone table surface beneath the tray adds material luxury at the foundation level. Moreover, this complete vignette costs under $55 total.
- Travertine table surface adds natural stone luxury foundation
- Round tray creates defined miniature designed environment
- Art books add sophisticated intellectual vignette character
- Dried cotton stems deliver delicate organic botanical height
- Complete luxury coffee table vignette costs under $55
Building a coffee table vignette that photographs beautifully and maintains its composed appearance through daily living room use requires balancing 3 competing priorities — visual beauty, practical accessibility, and physical stability — simultaneously within the tray’s limited surface area. Reserve the front quarter of the tray surface completely clear of objects — this empty front zone provides a natural resting place for drinks, remotes, and daily-use items without disturbing the styled back portion of the vignette. Moreover, positioning the tallest vignette element — the bud vase — toward the tray’s back edge creates a natural visual depth gradient from tall at the back to low at the front that makes the arrangement appear larger and more dimensionally rich than its physical footprint suggests. Additionally, choosing a tray with a low 1-inch rim rather than a tall-sided tray ensures the arranged objects remain clearly visible and fully appreciable from the sofa seating position directly above the coffee table surface.
Conclusion
A beautiful home does not need a huge budget. It needs smart choices, clean styling, and a few well-placed details that make every room feel intentional. These ideas show how to make a home feel expensive in a way that still feels personal and livable. Save this post on Pinterest, try one or two updates this weekend, and share it with anyone who loves a polished home look. I have seen how even one refined change can transform a room’s confidence and comfort.
FAQs
How do I make a home look expensive on a budget?
Start with lighting, curtains, and decluttering. Then add one luxury-feeling material, like linen, brass, marble, or velvet. These small upgrades create a polished look fast without a full remodel.
What colors make a home feel expensive?
Cream, warm white, taupe, charcoal, deep green, and soft black often look the most refined. These colors create calm contrast and make furniture, art, and textures feel more intentional.
What is the easiest room to upgrade first?
The living room usually gives the biggest visual payoff. Change the pillows, lamp, rug, and coffee table styling first. Those four updates can make the whole room feel more finished.
Do matching decor pieces make a home look more expensive?
Yes, but only when they feel intentional. Repeating one or two tones across pillows, frames, and trays creates a pulled-together look. Too much matching can feel flat, so add texture too.
How do I make a rental look expensive?
Use removable upgrades like peel-and-stick molding, better curtain panels, large art prints, and layered rugs. These changes improve the room’s structure and style without permanent changes.
What makes a room look cheap?
Too many small items, weak lighting, cluttered surfaces, and low-quality fabric often make a room feel less polished. Editing the space and upgrading visible touchpoints usually fixes that quickly.